Run a group class or workshop
One link per class: spots, card or pay-at-venue payments, a waitlist and check-in, all handled for you.
Step 1: Create a class
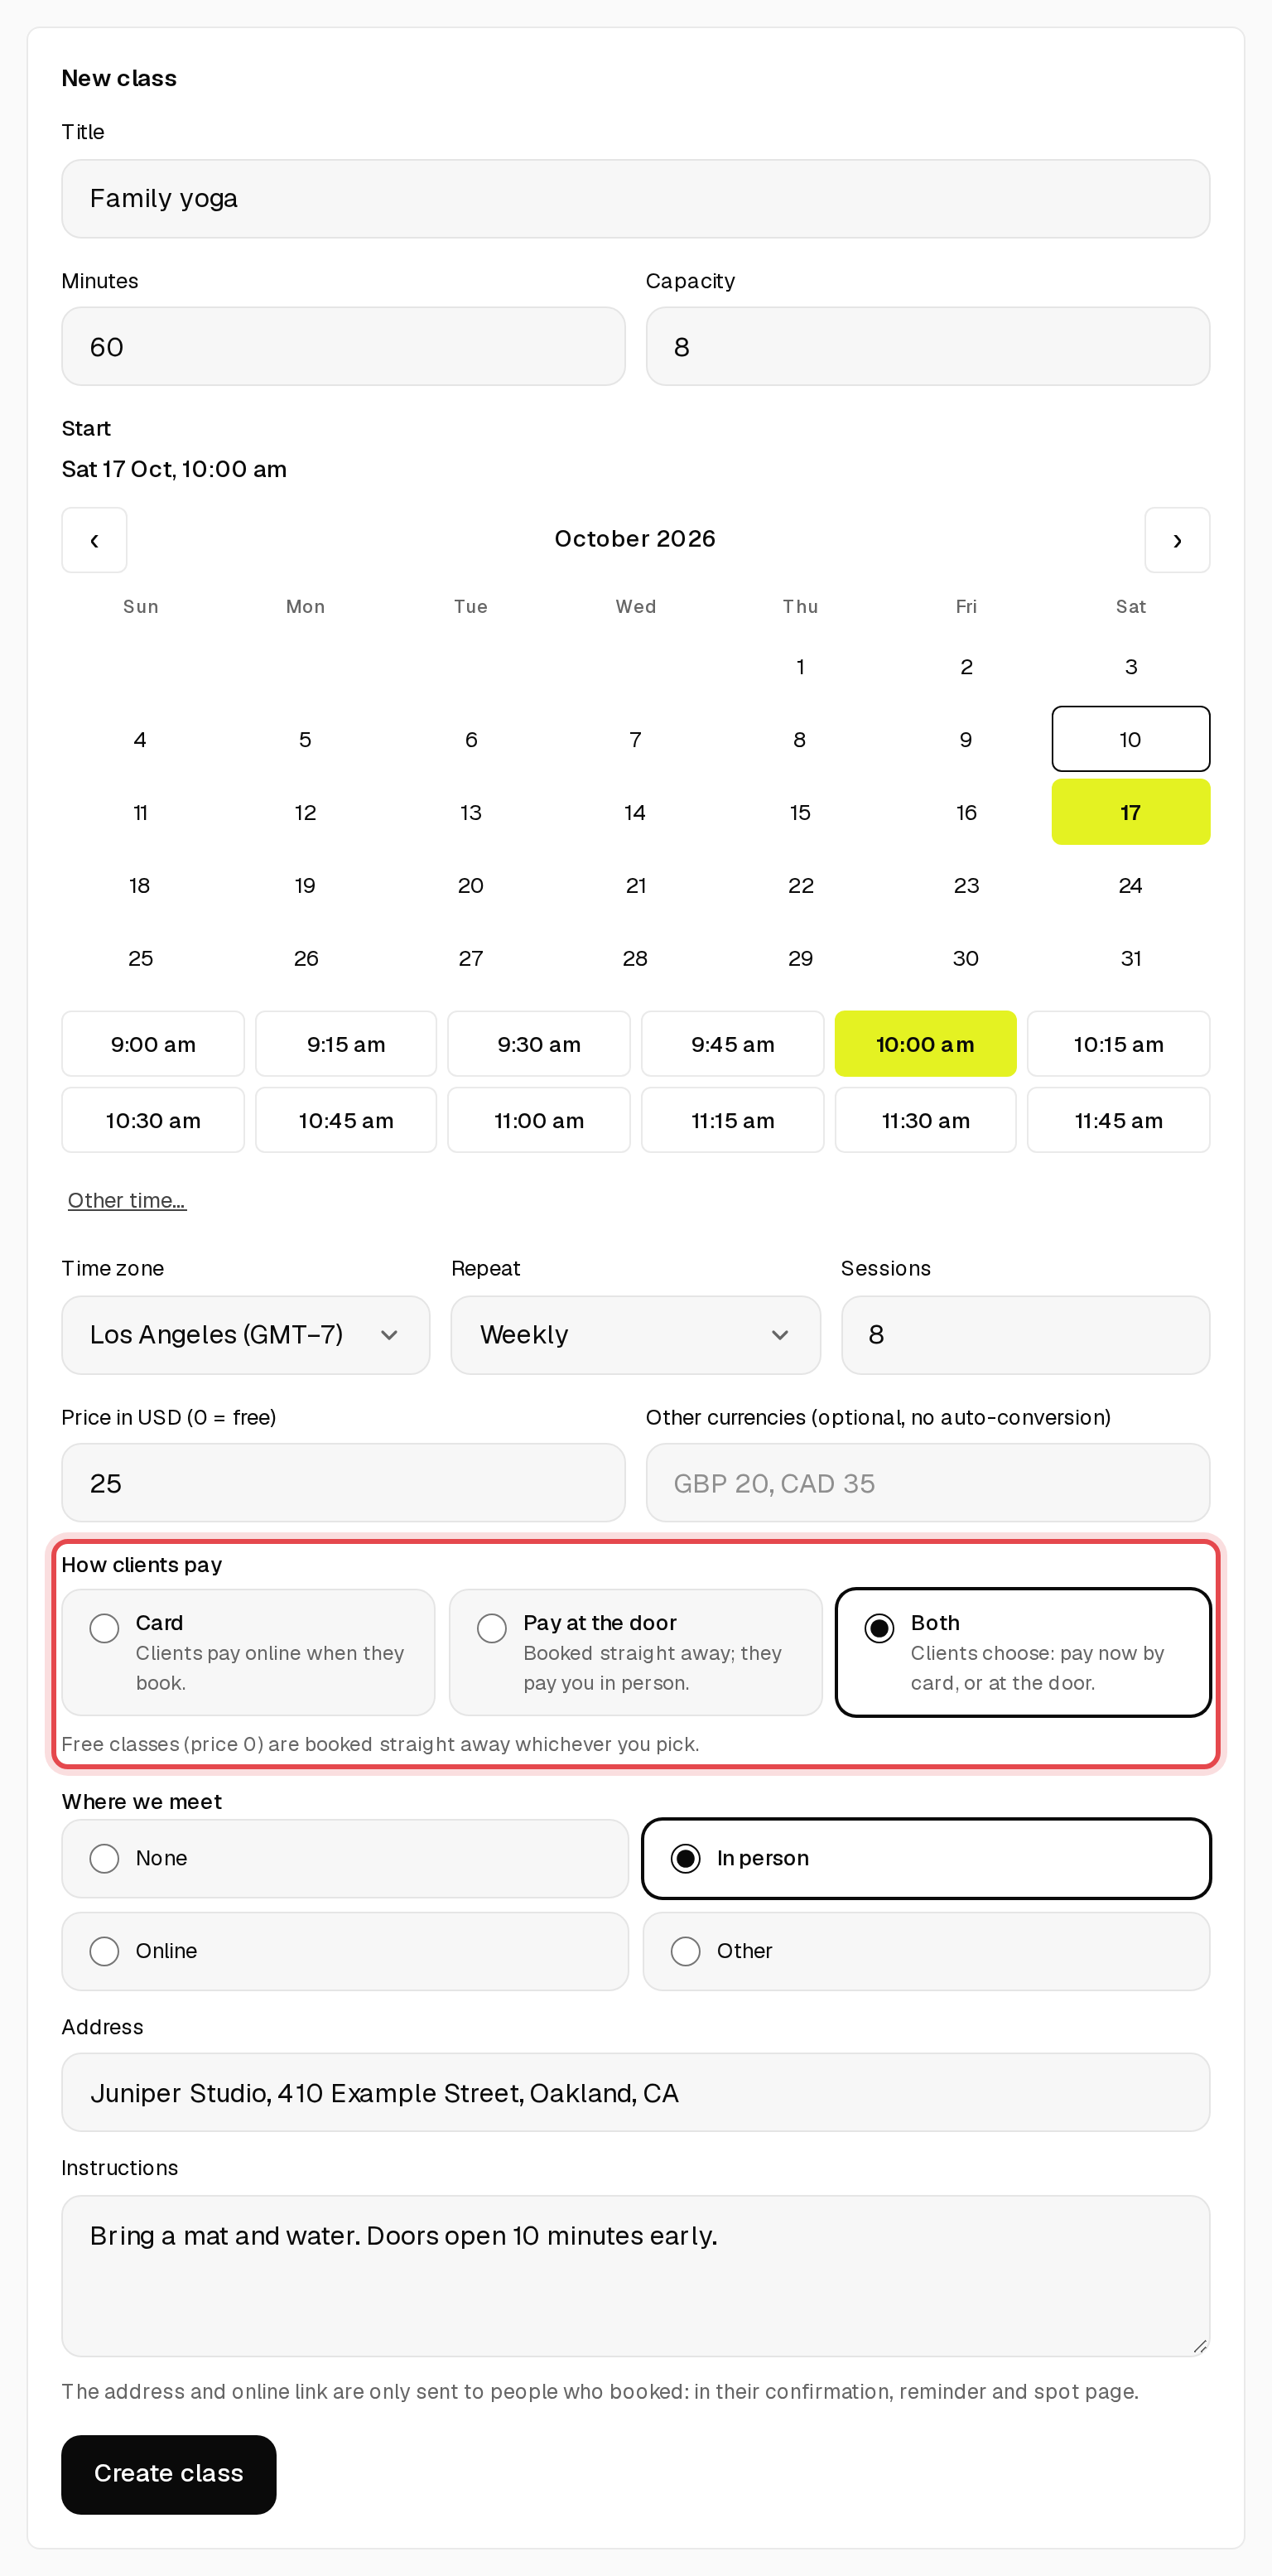
Go to Groups and fill in New class: Title, Minutes, Capacity and Start. Under Repeat, pick One-off or Weekly and the number of Sessions, then set the price, How clients pay (Card, Pay at venue or Both) and Where we meet. Click Create class.
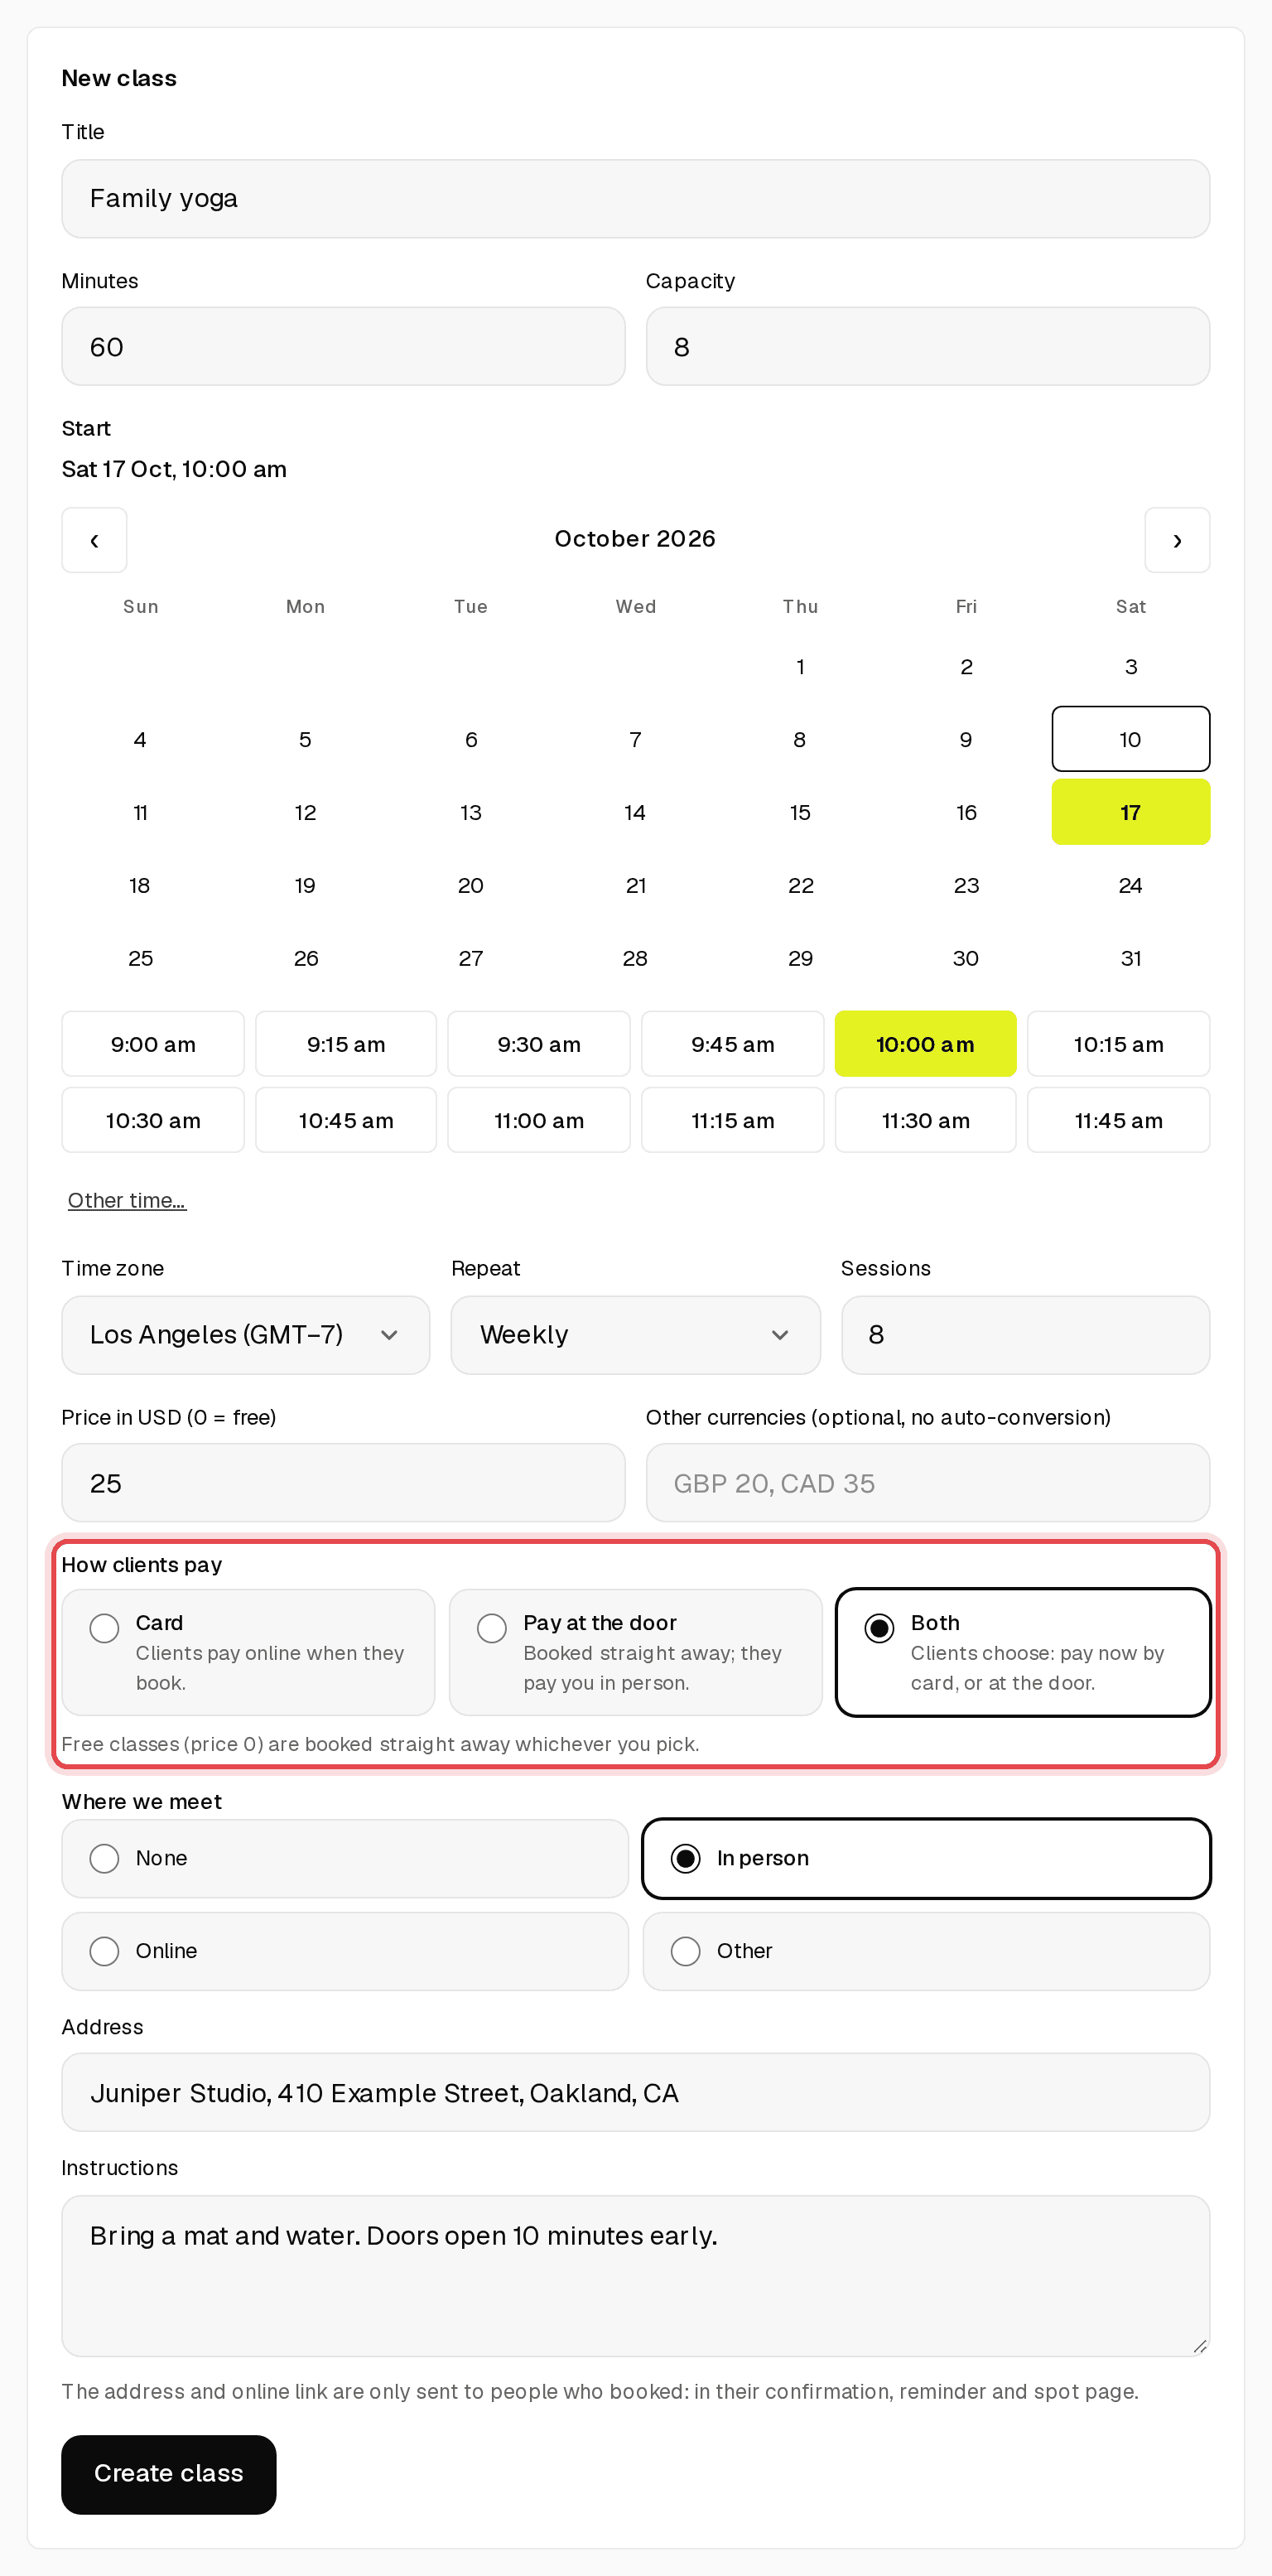
Tip: The address or online link is only sent to people who booked, in their confirmation, reminder and spot page.
Step 2: Share the class link
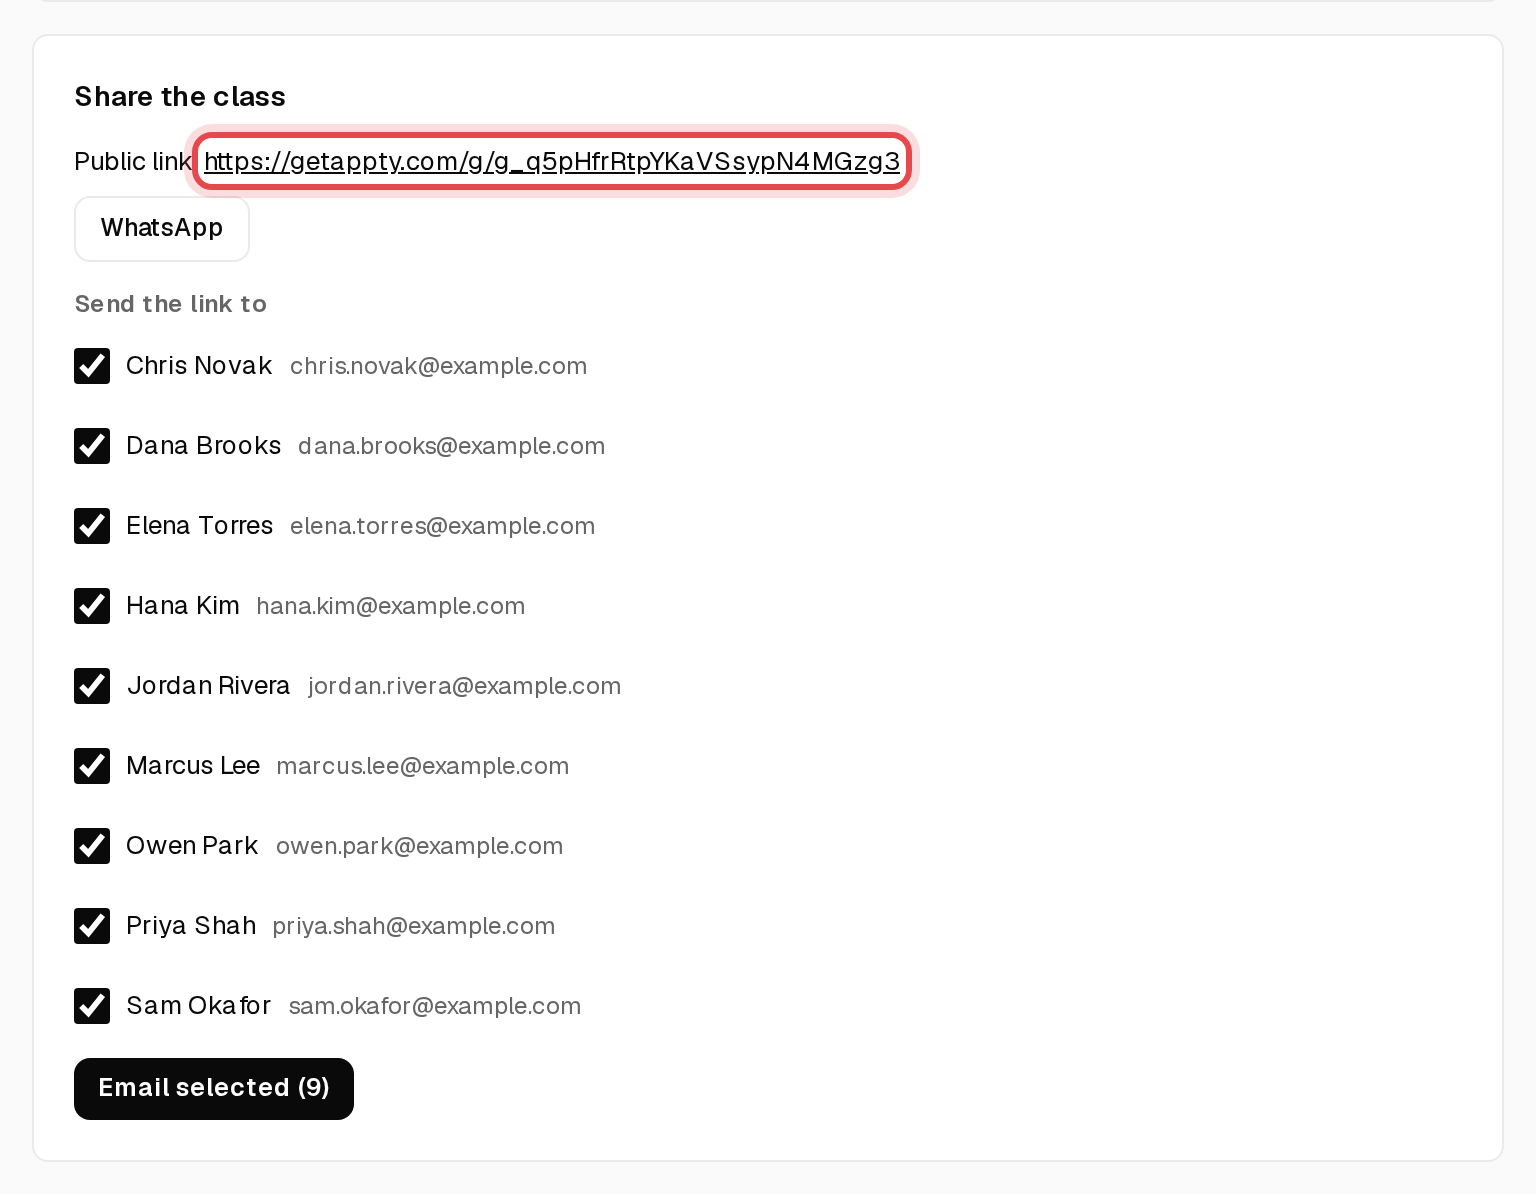
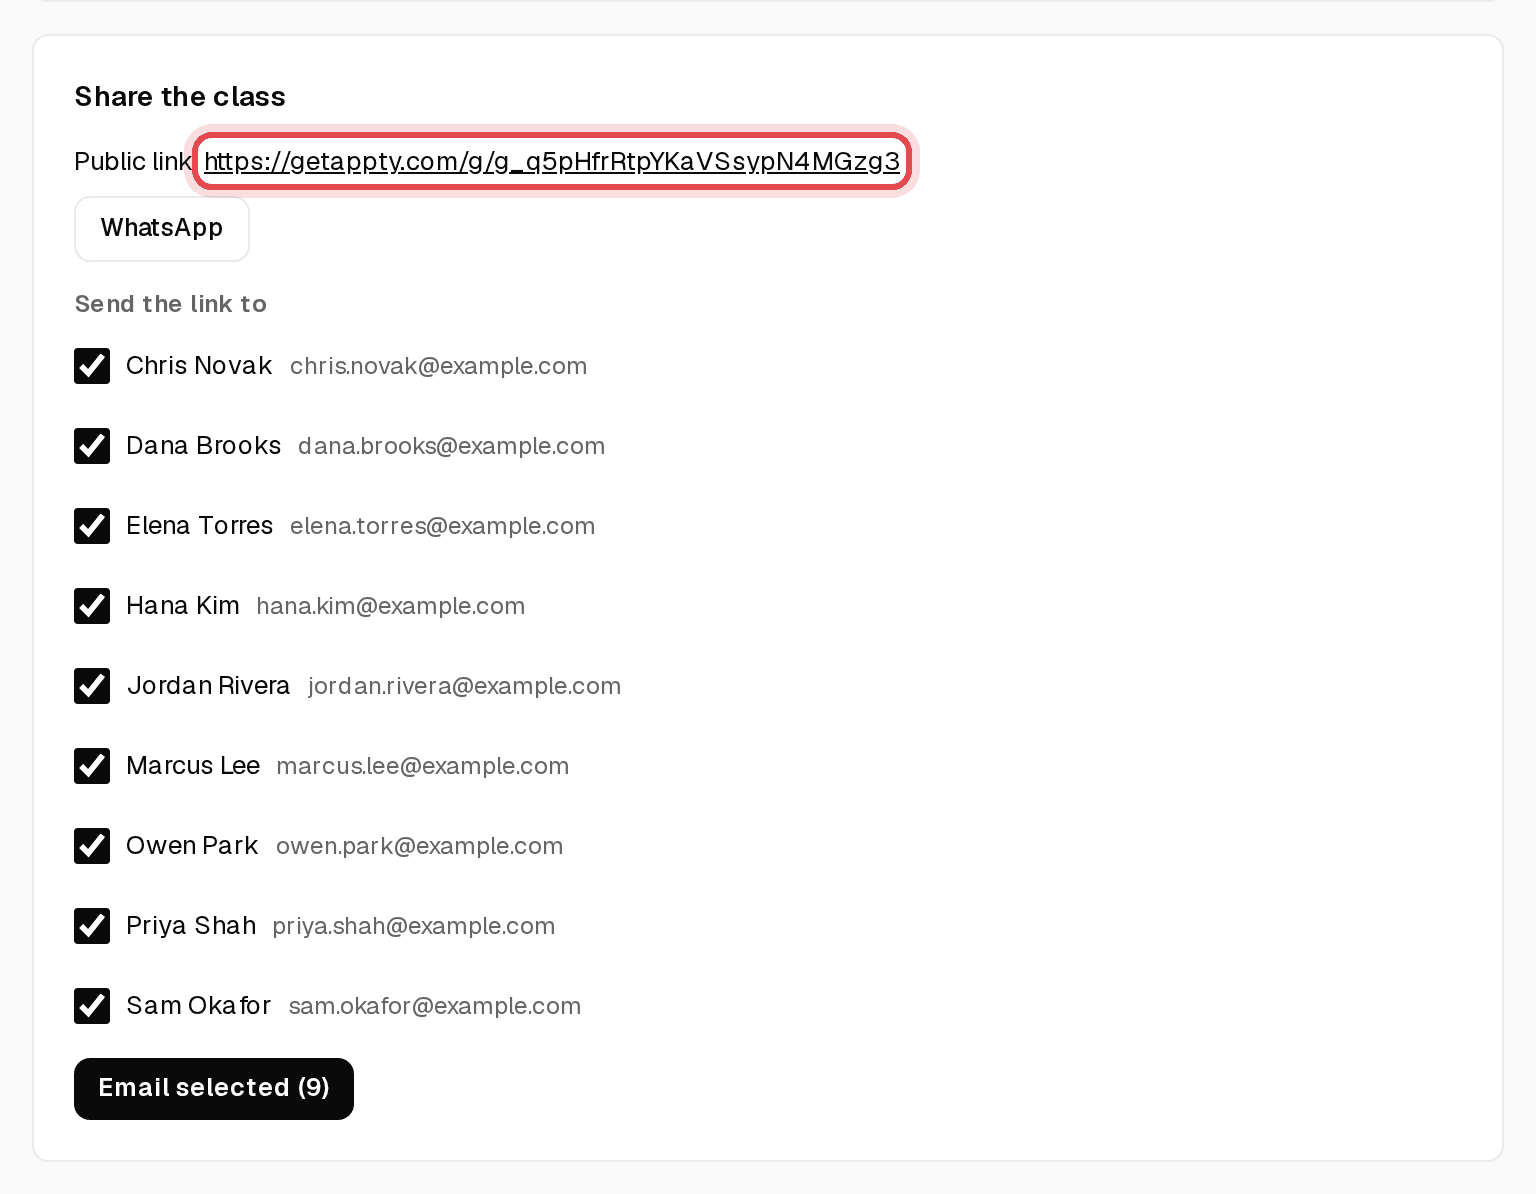
Each class has its own Public link under Share the class. Send it on WhatsApp, or tick clients under Send the link to and click Email selected.
Step 3: Clients book their spot
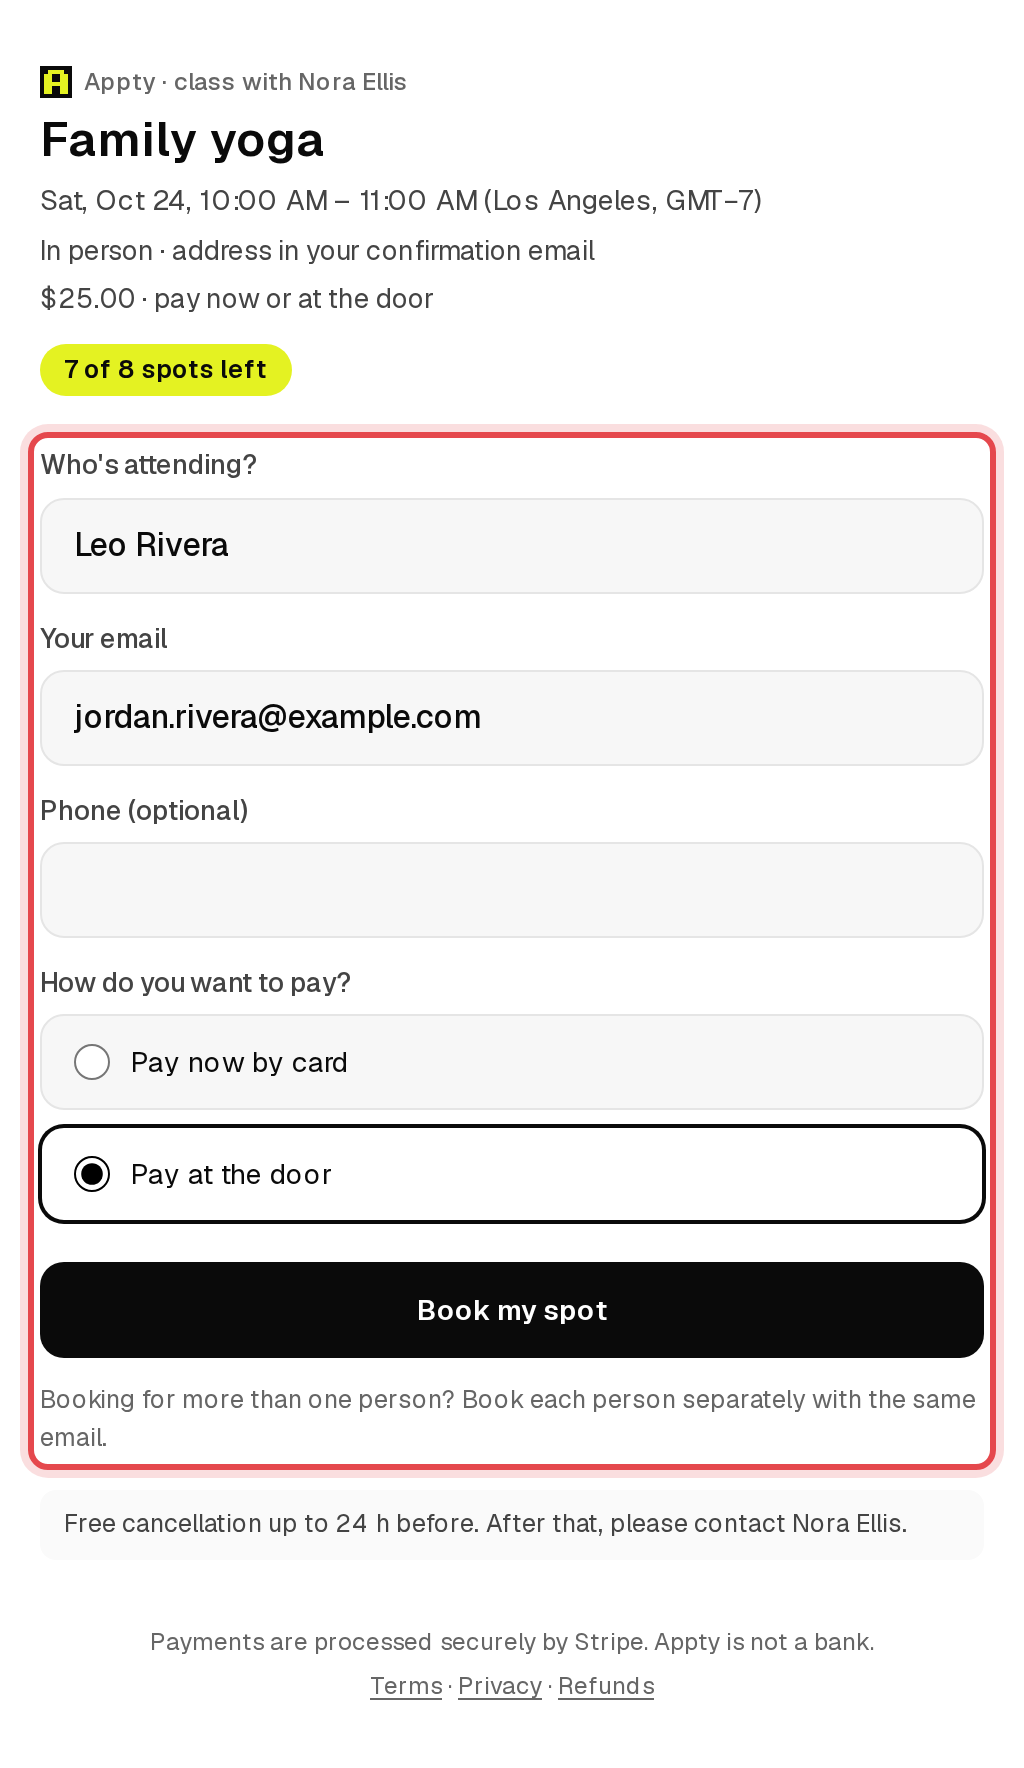
The link shows the time with its GMT offset, the price and how many spots are left. Clients type Who's attending? and their email, choose Pay now by card or Pay at venue, and click Book my spot.
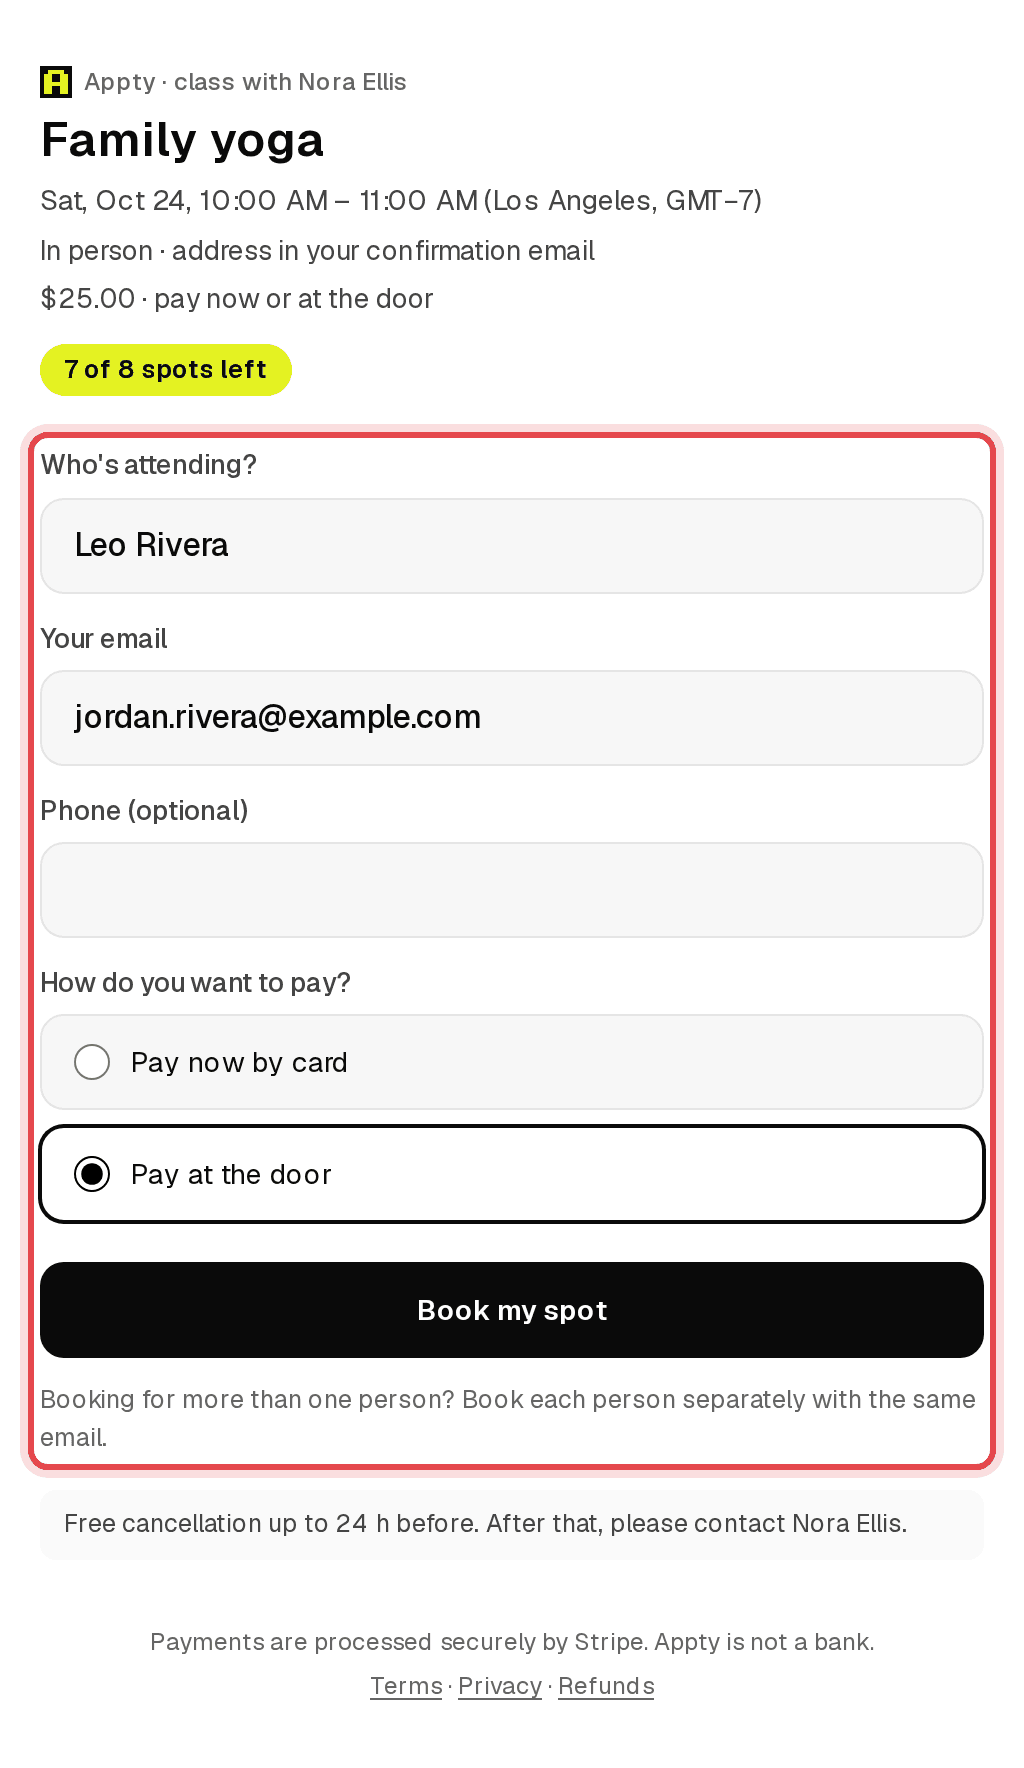
Tip: Booking for two children? A parent books each child separately with the same email, so every child gets their own named spot.
Step 4: The roster and waitlist
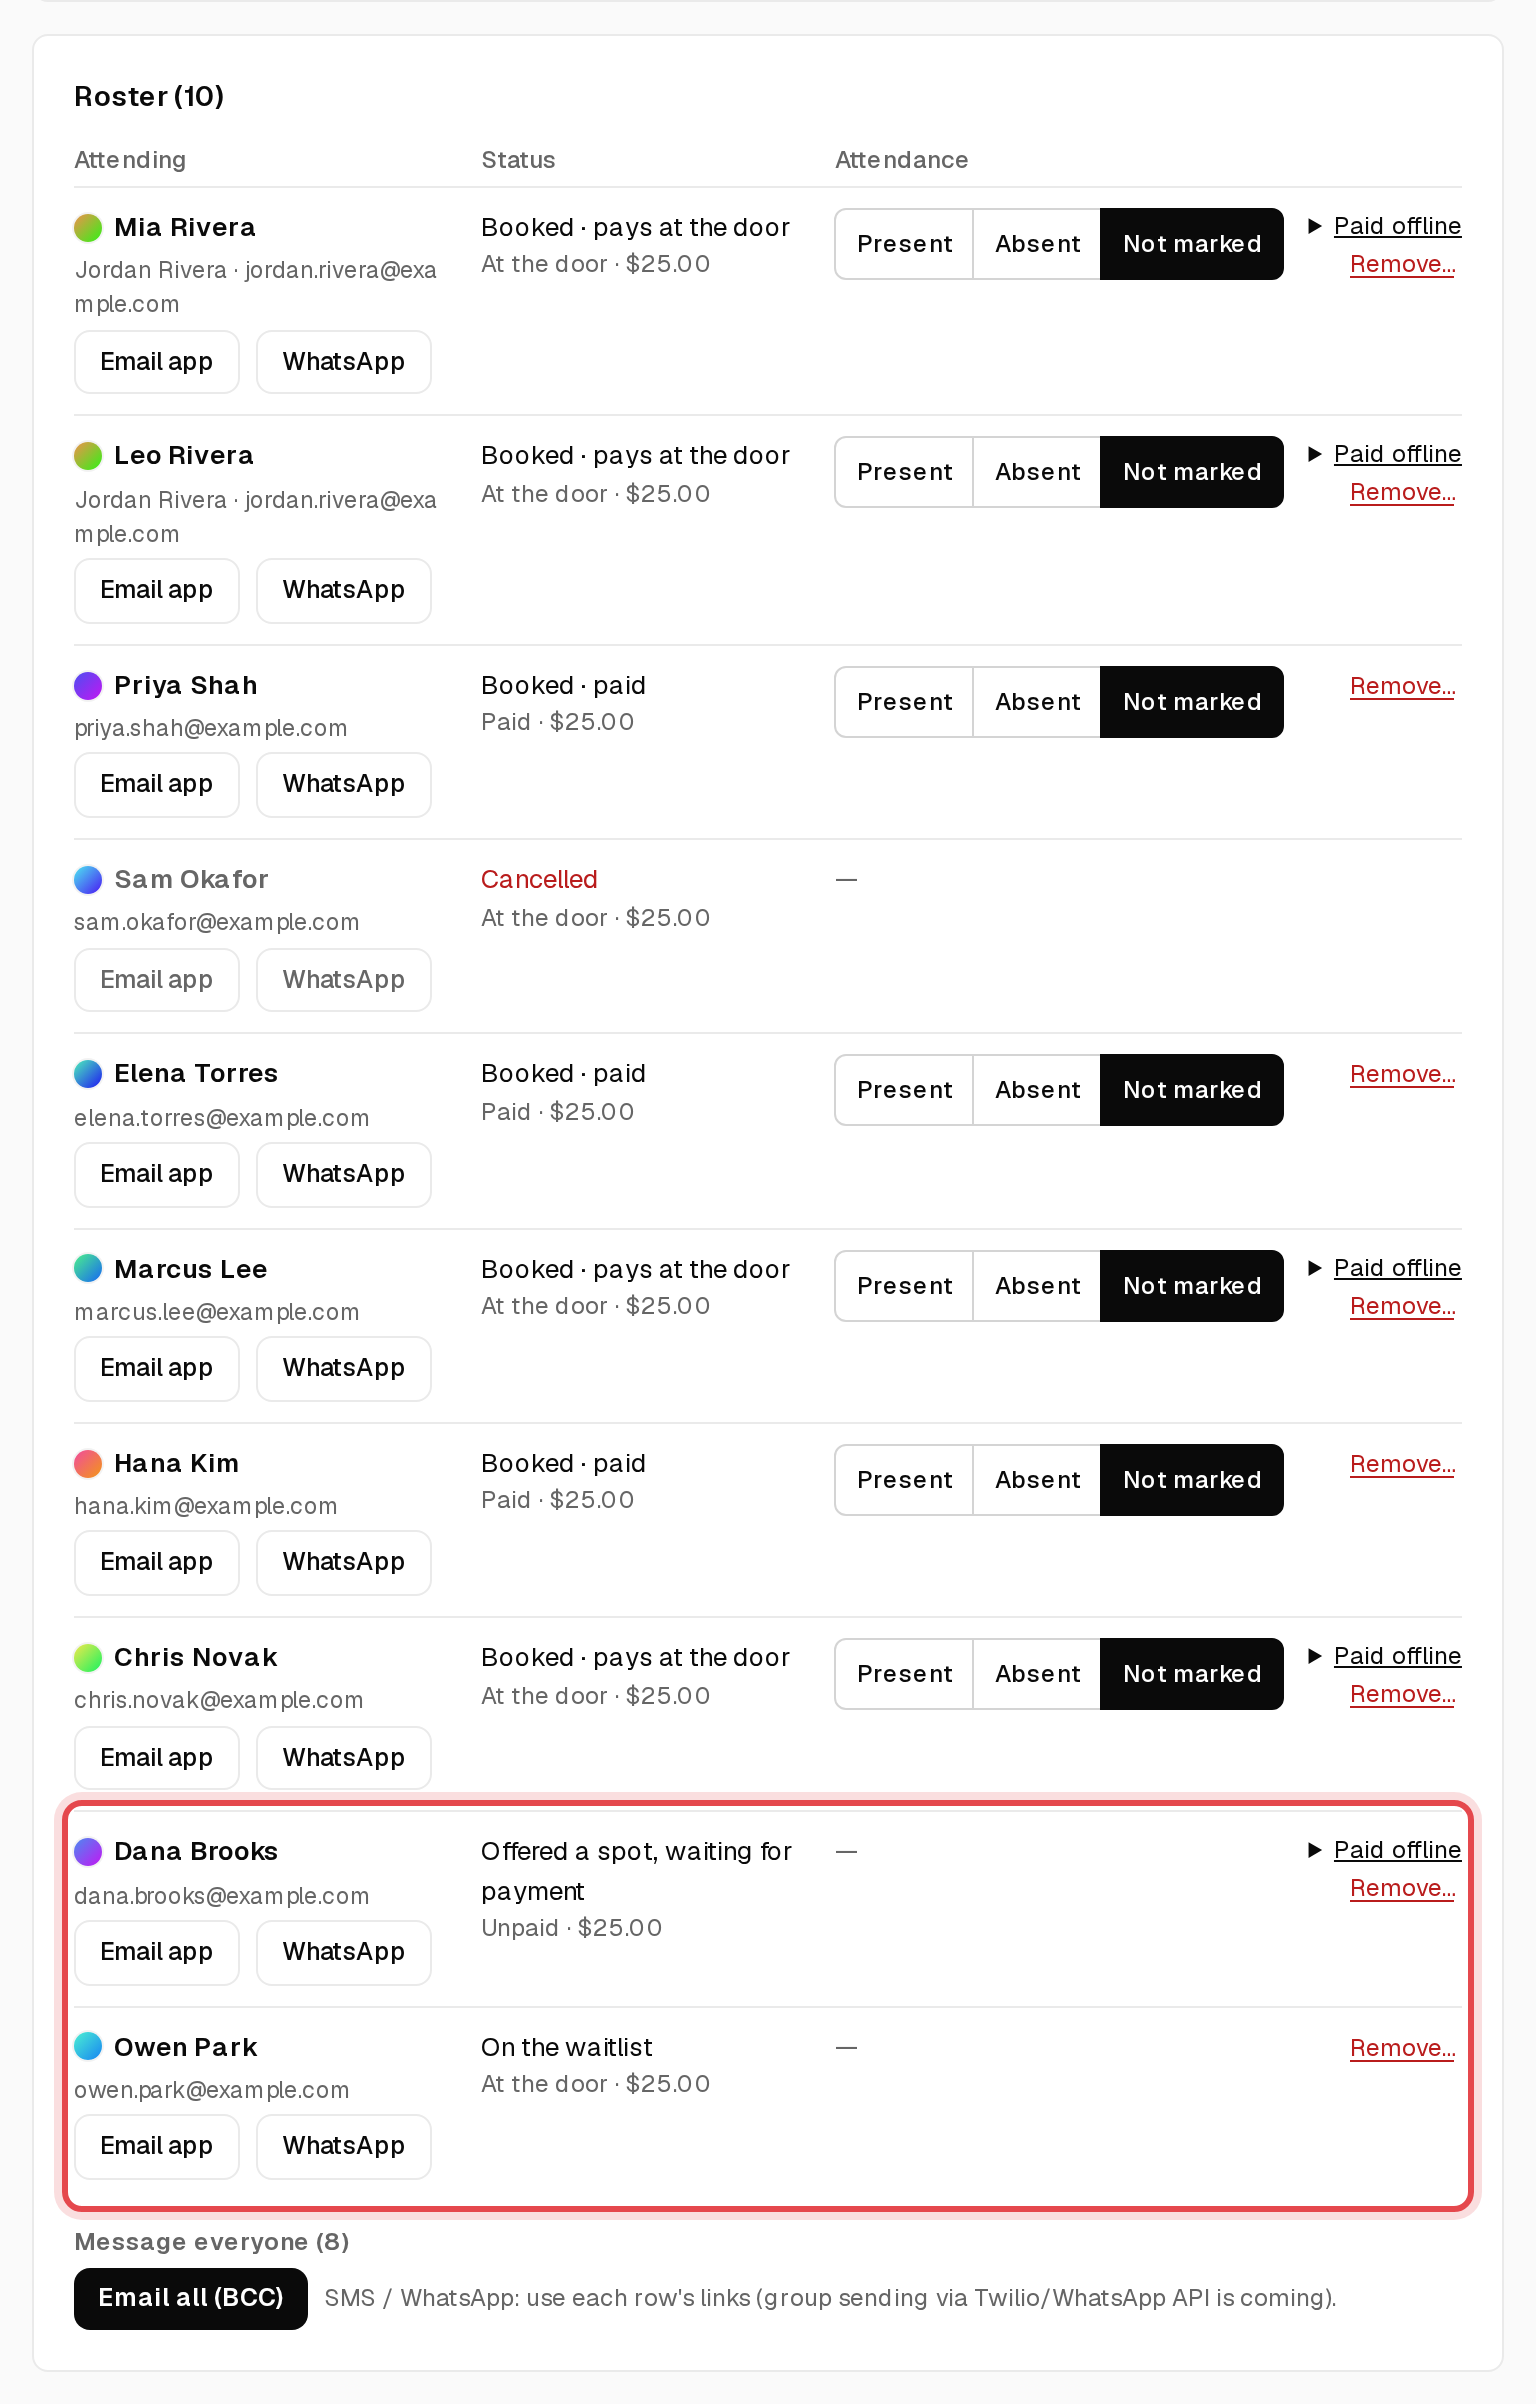
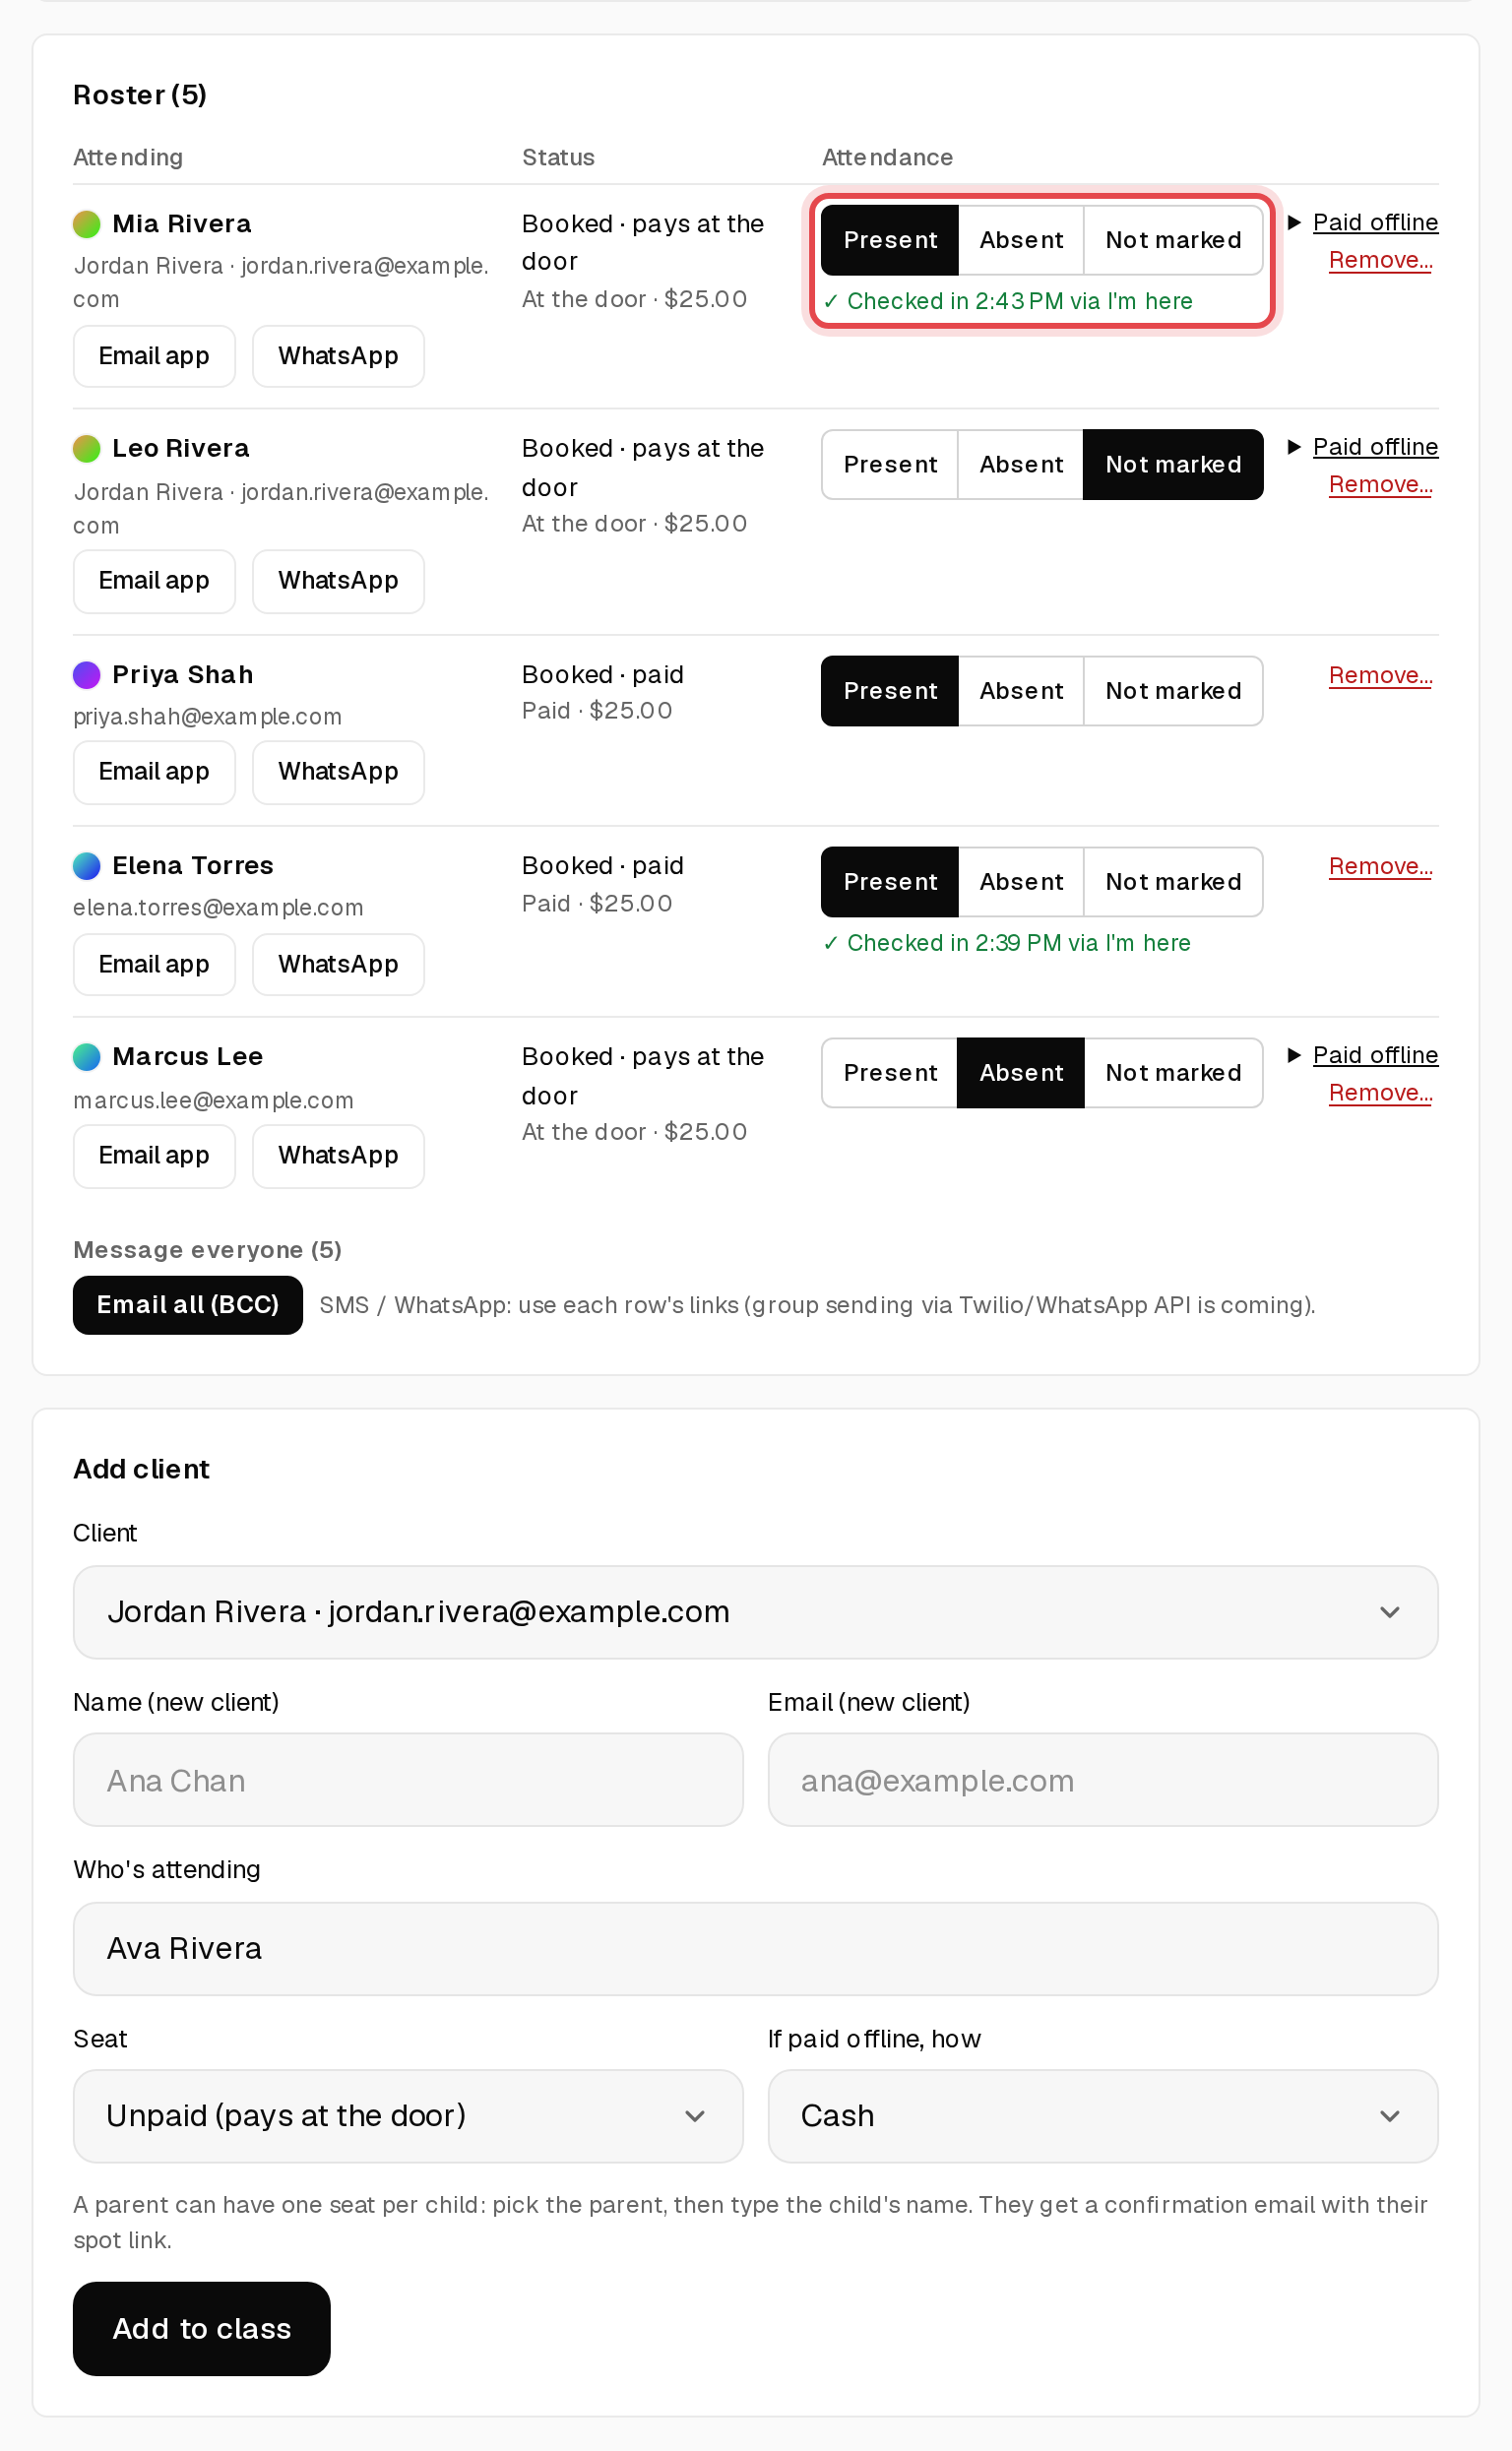
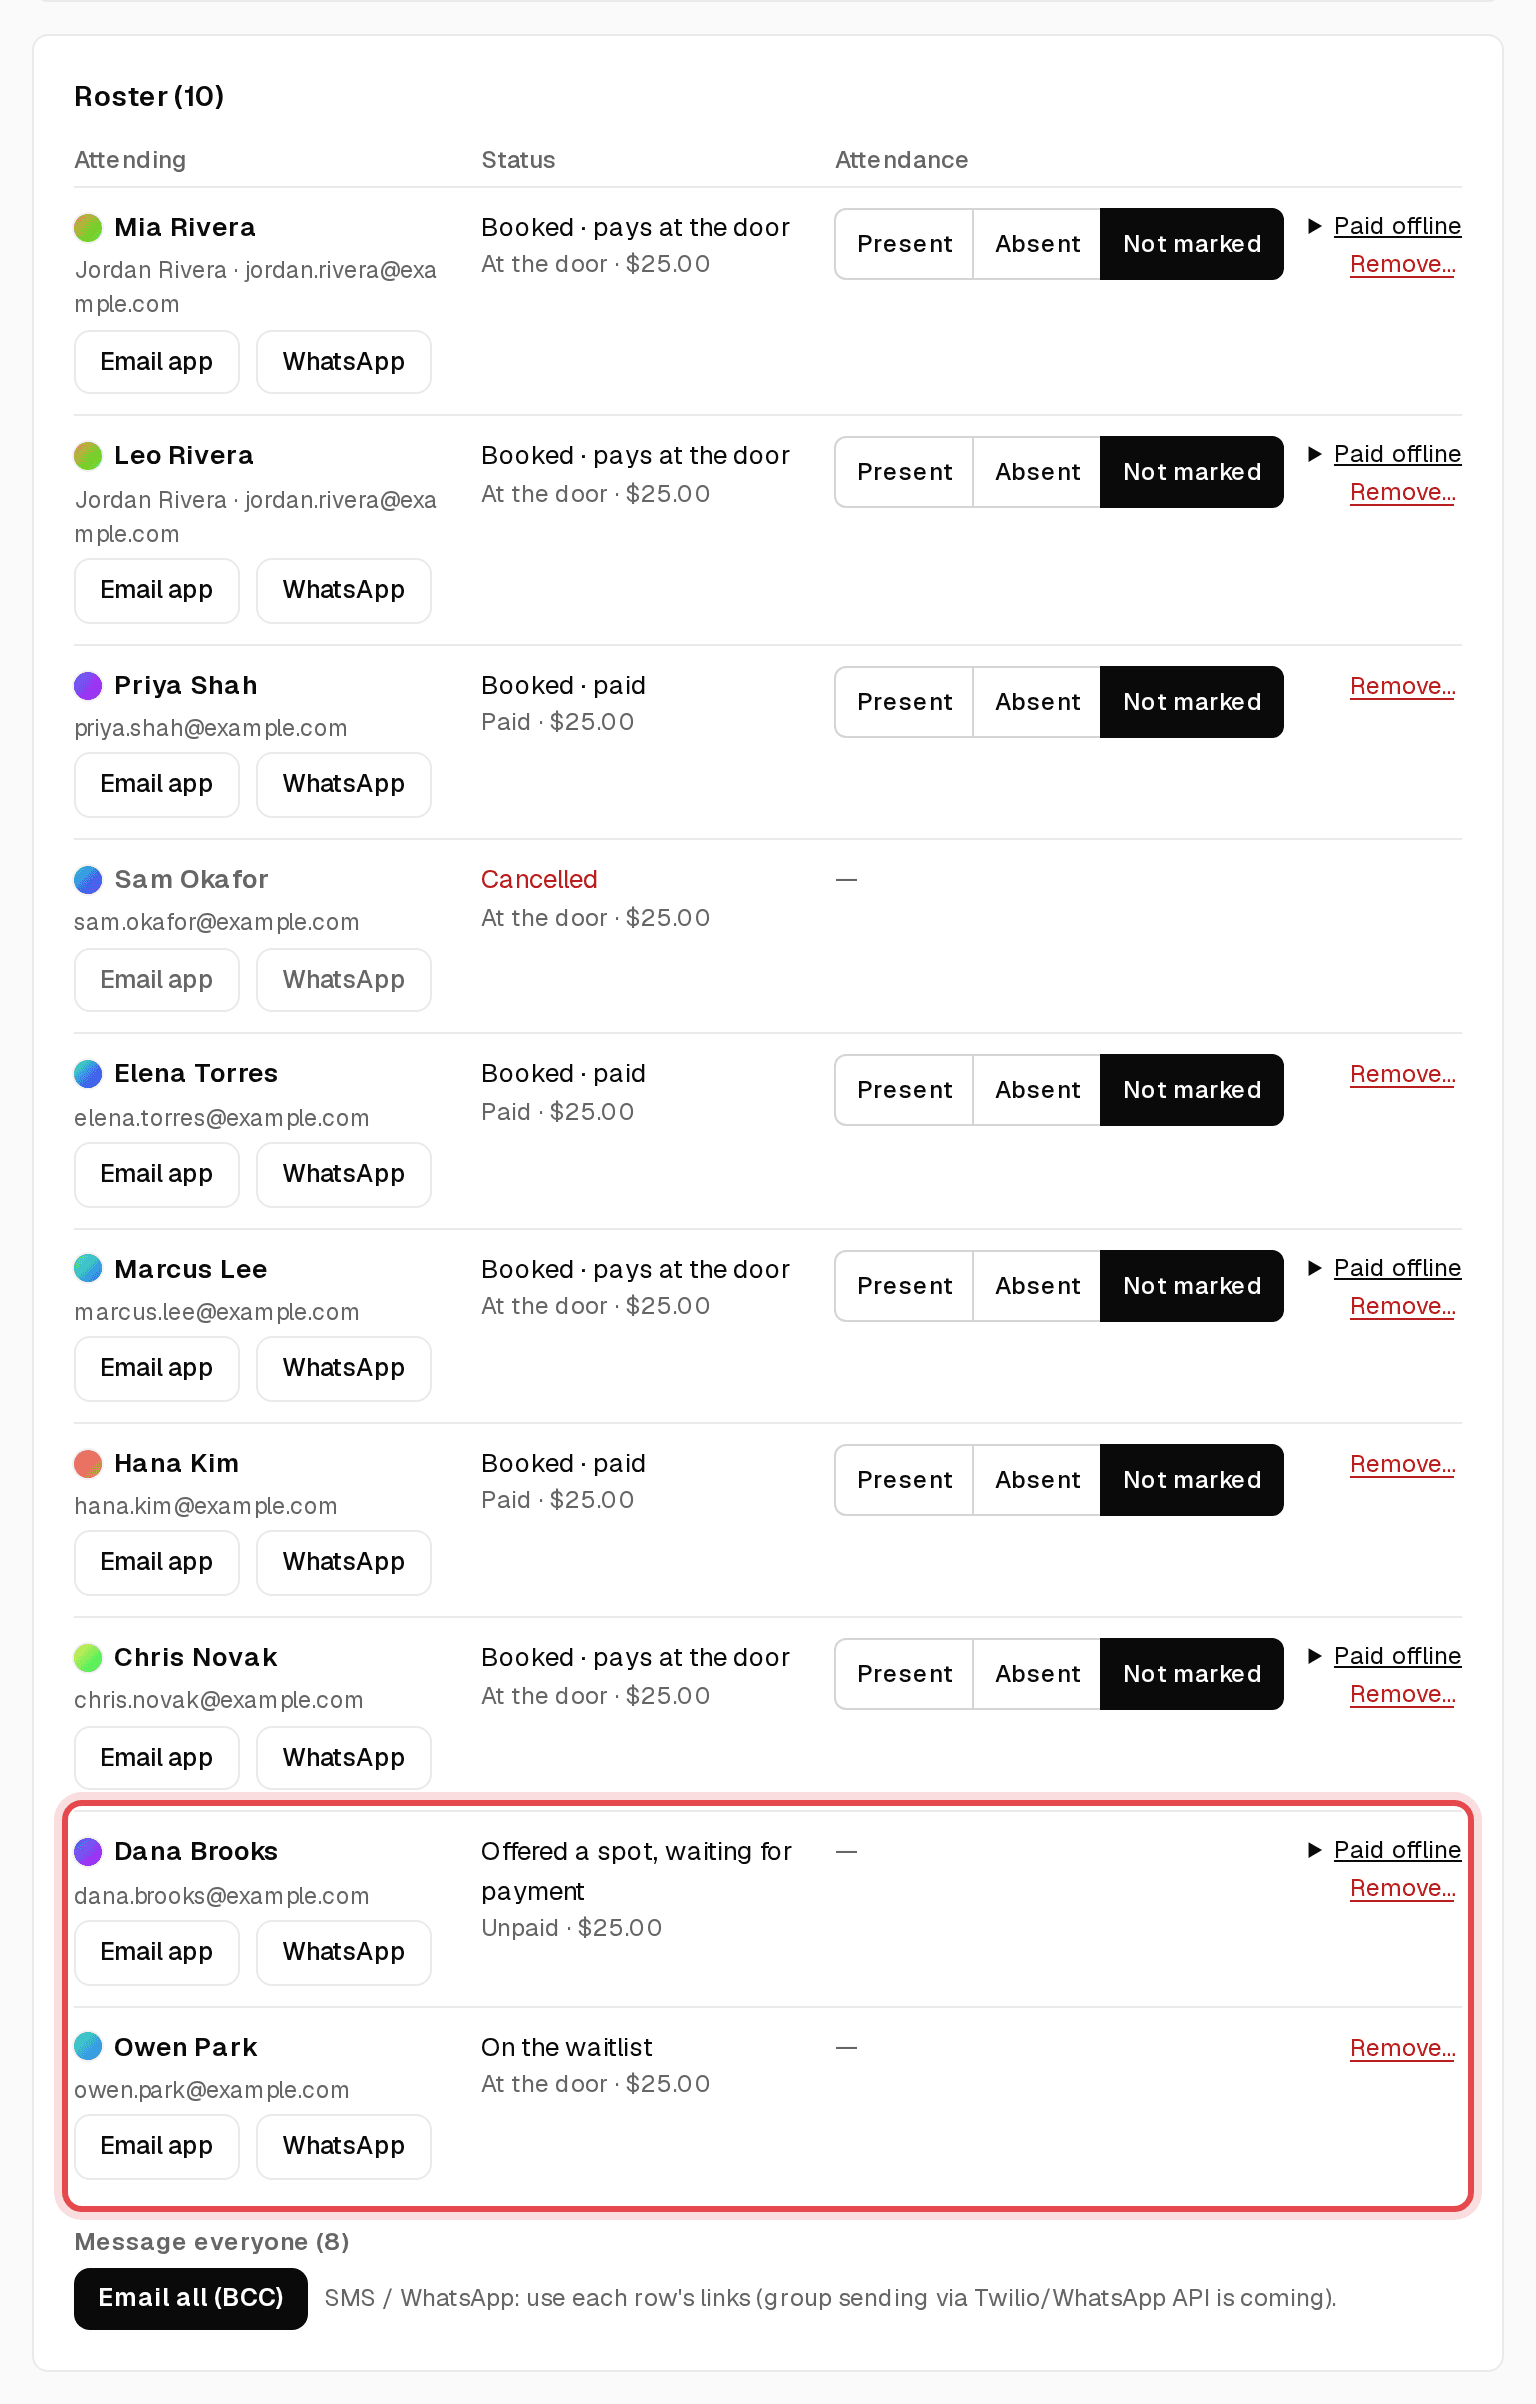
The class page lists everyone under Roster with their status and payment. When the class is full, the link turns into Join waitlist. If a spot opens, the next person is offered it automatically: card payers get 12 hours to pay, and pay-at-venue spots are booked straight away.
Step 5: Clients check in with I'm here
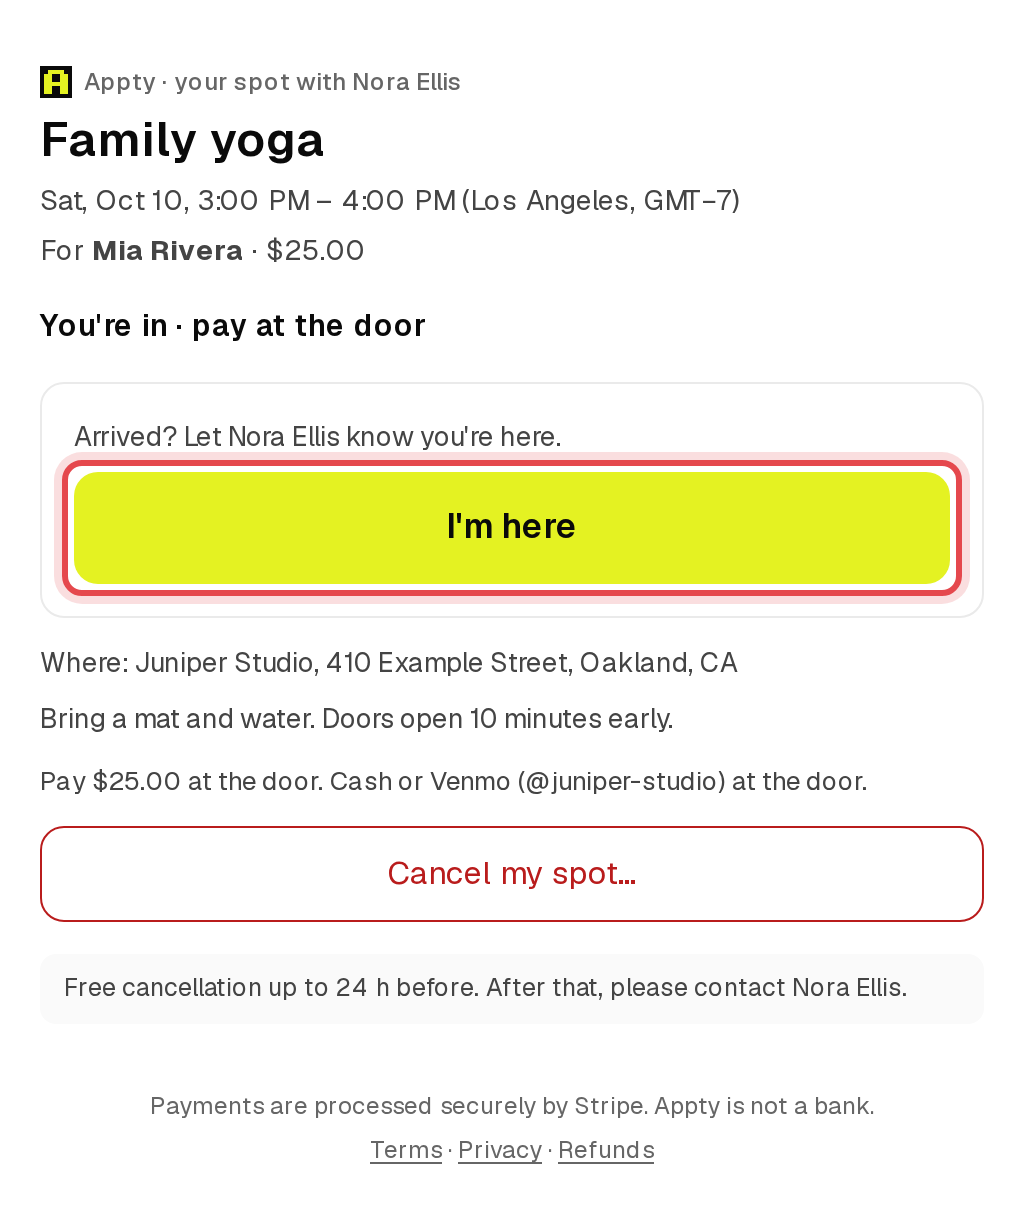
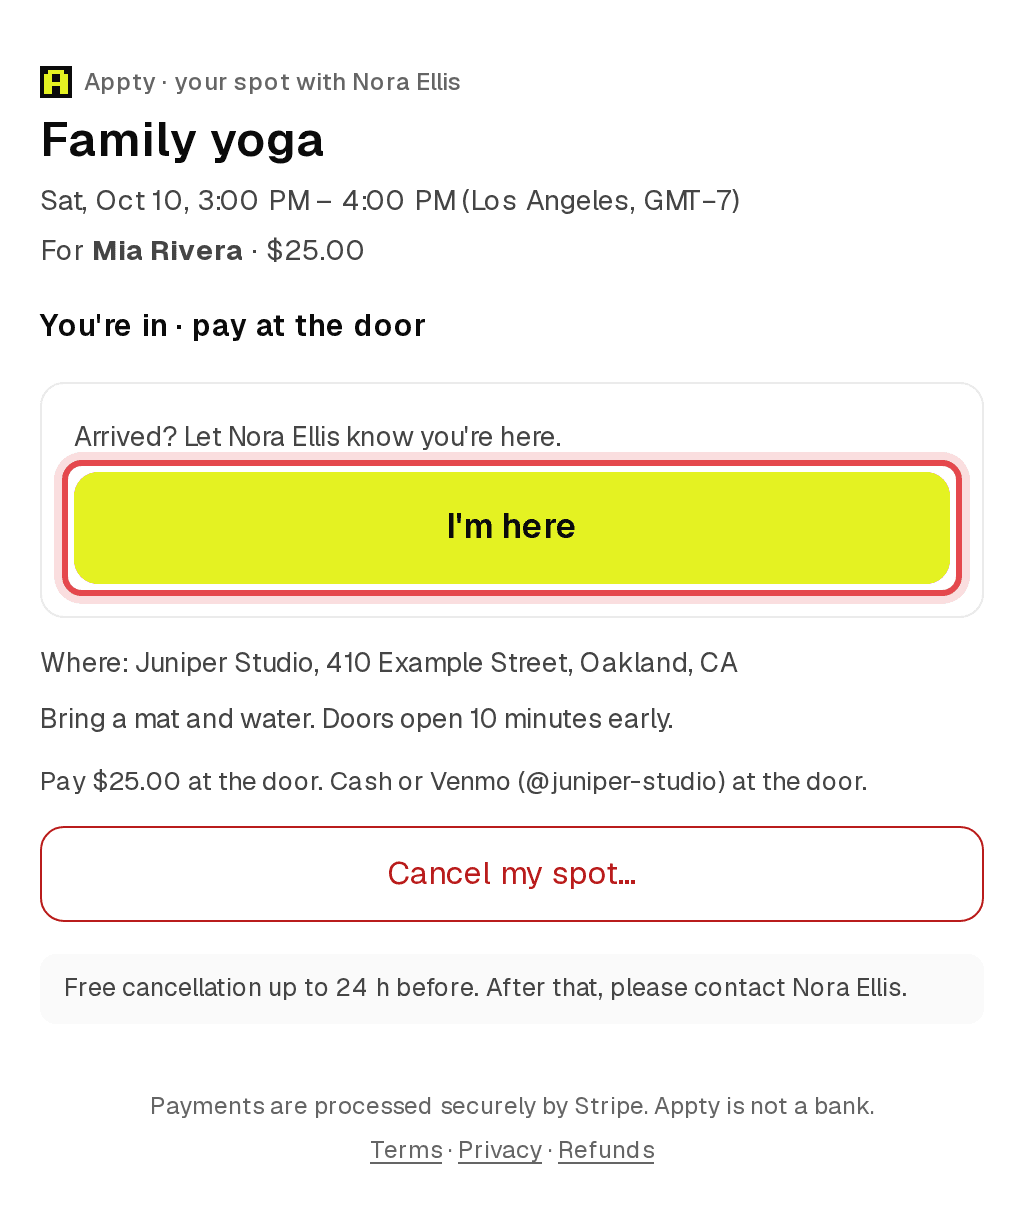
Every booked client gets their own spot page. From 30 minutes before the start until 30 minutes after, it shows an I'm here button they can tap when they arrive.
Step 6: Mark attendance or add a client
On the roster, a check-in shows as Checked in via I'm here. Click Present or Absent for anyone else. To add someone yourself, use Add client, choose their seat and click Add to class.
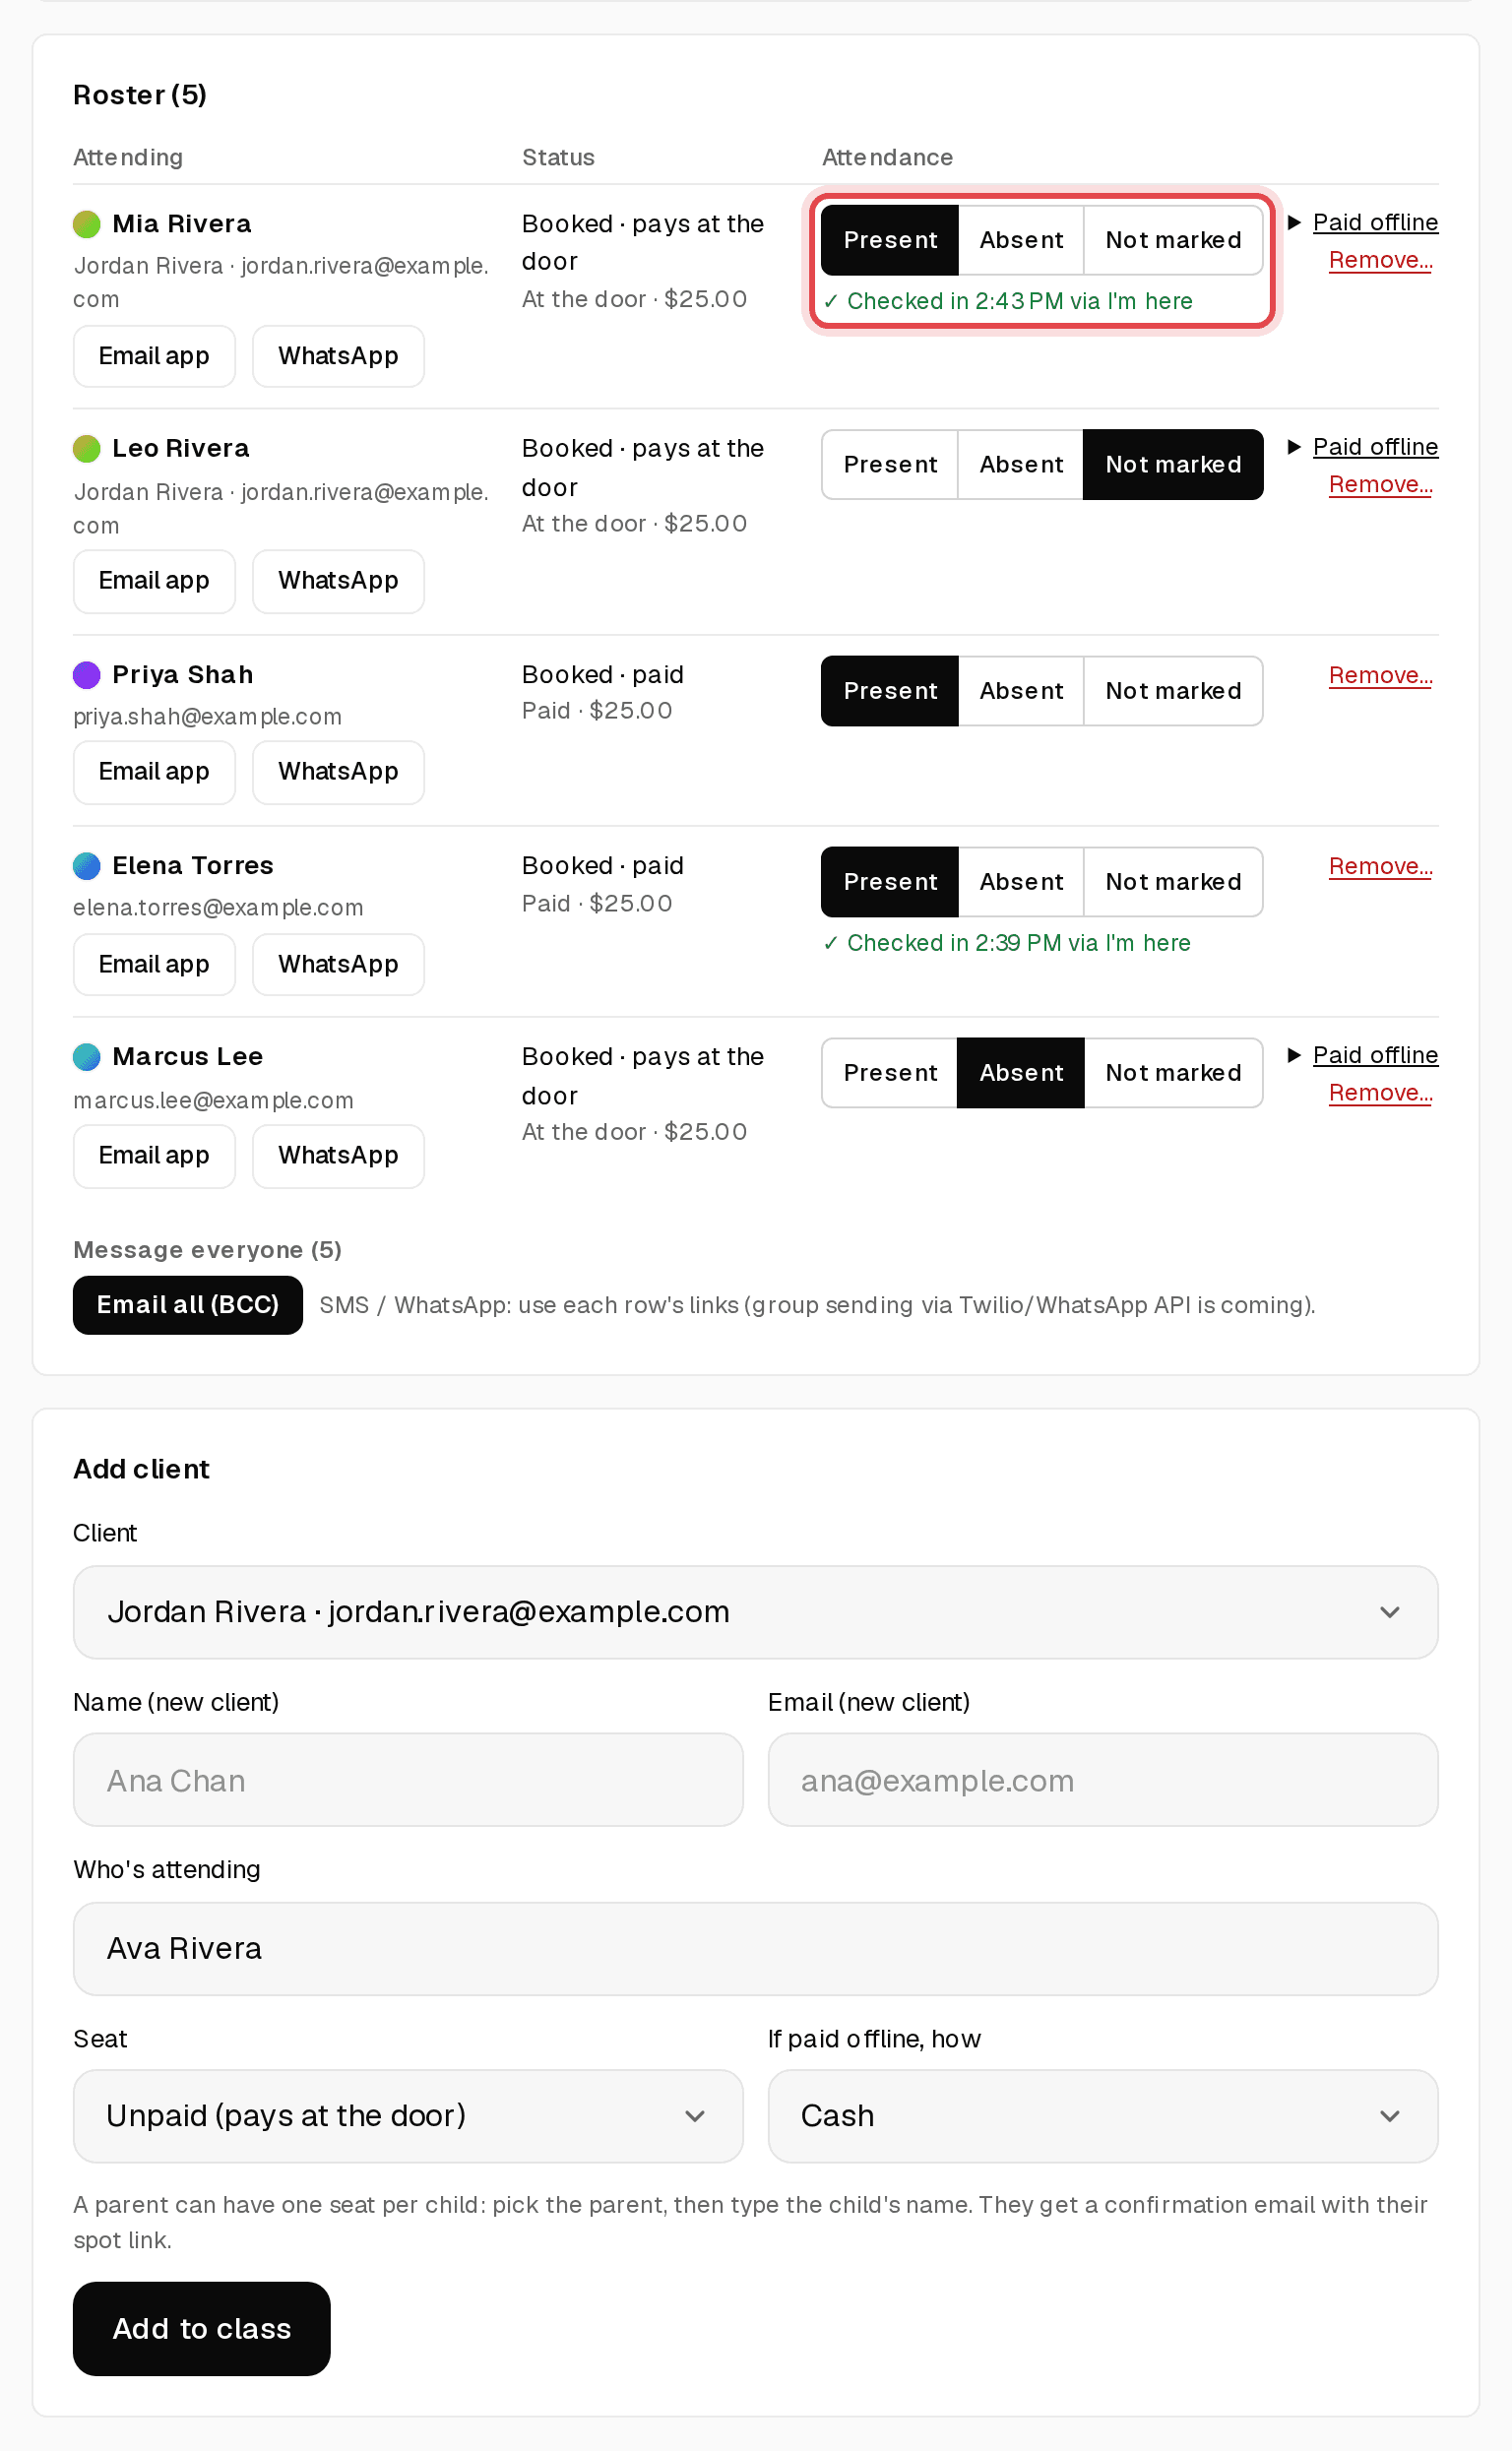
Tip: Adding a child? Pick the parent under Client, then type the child's name under Who's attending.
Step 7: Edit or cancel
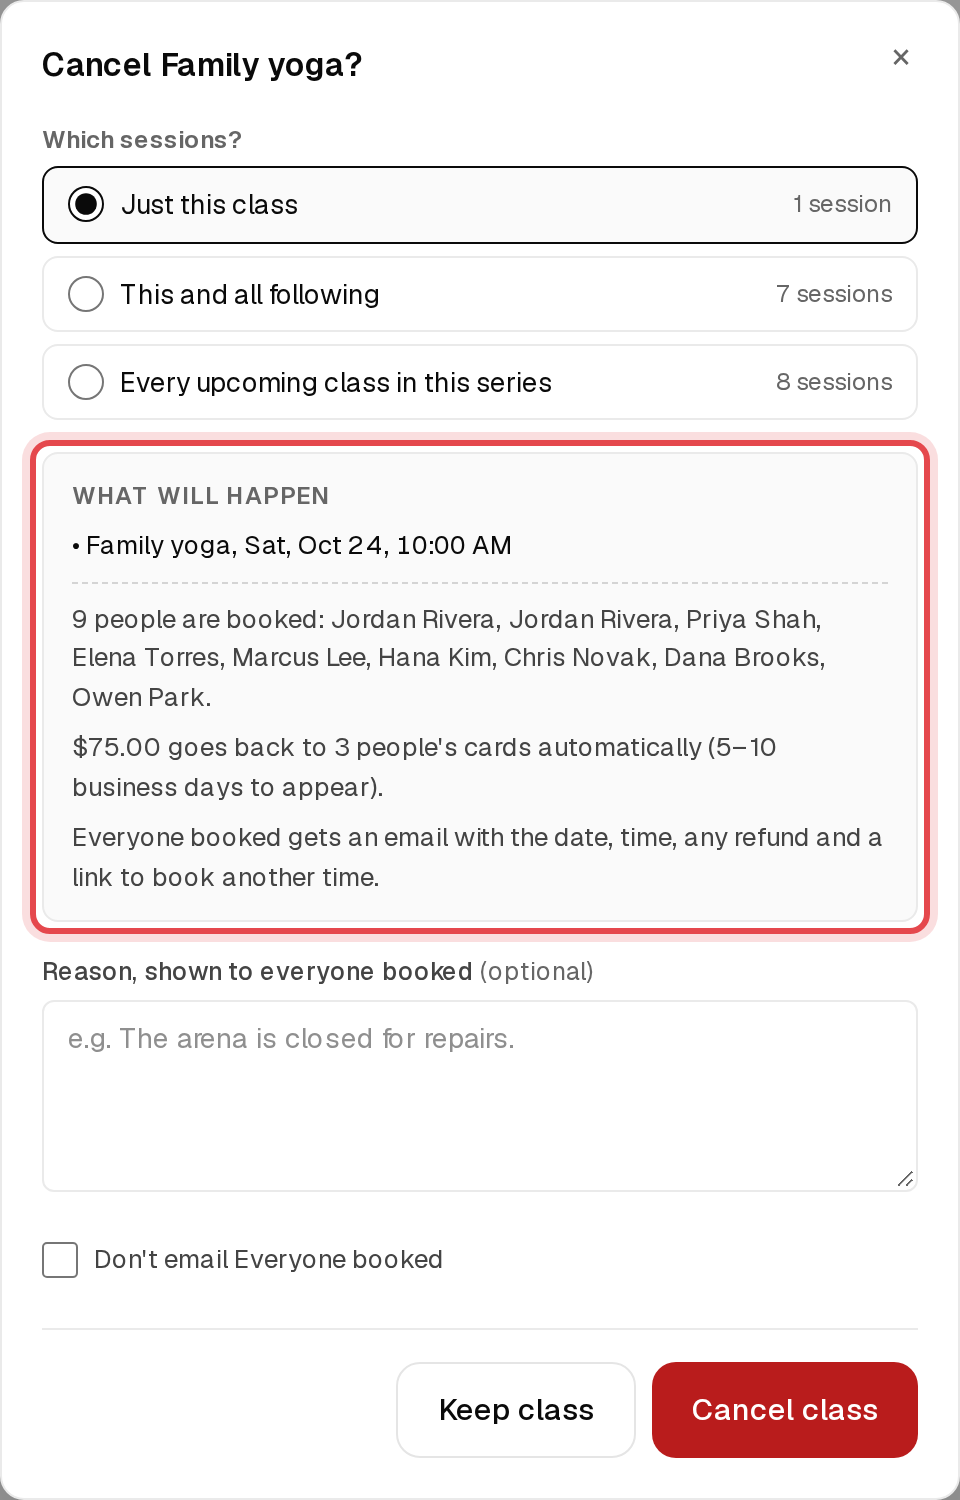
Open Edit class to change the time, capacity, price options or place, then click Save changes. Use Remove… on a roster row to cancel one spot, or Cancel class… to cancel this class, this and all following, or the whole series.
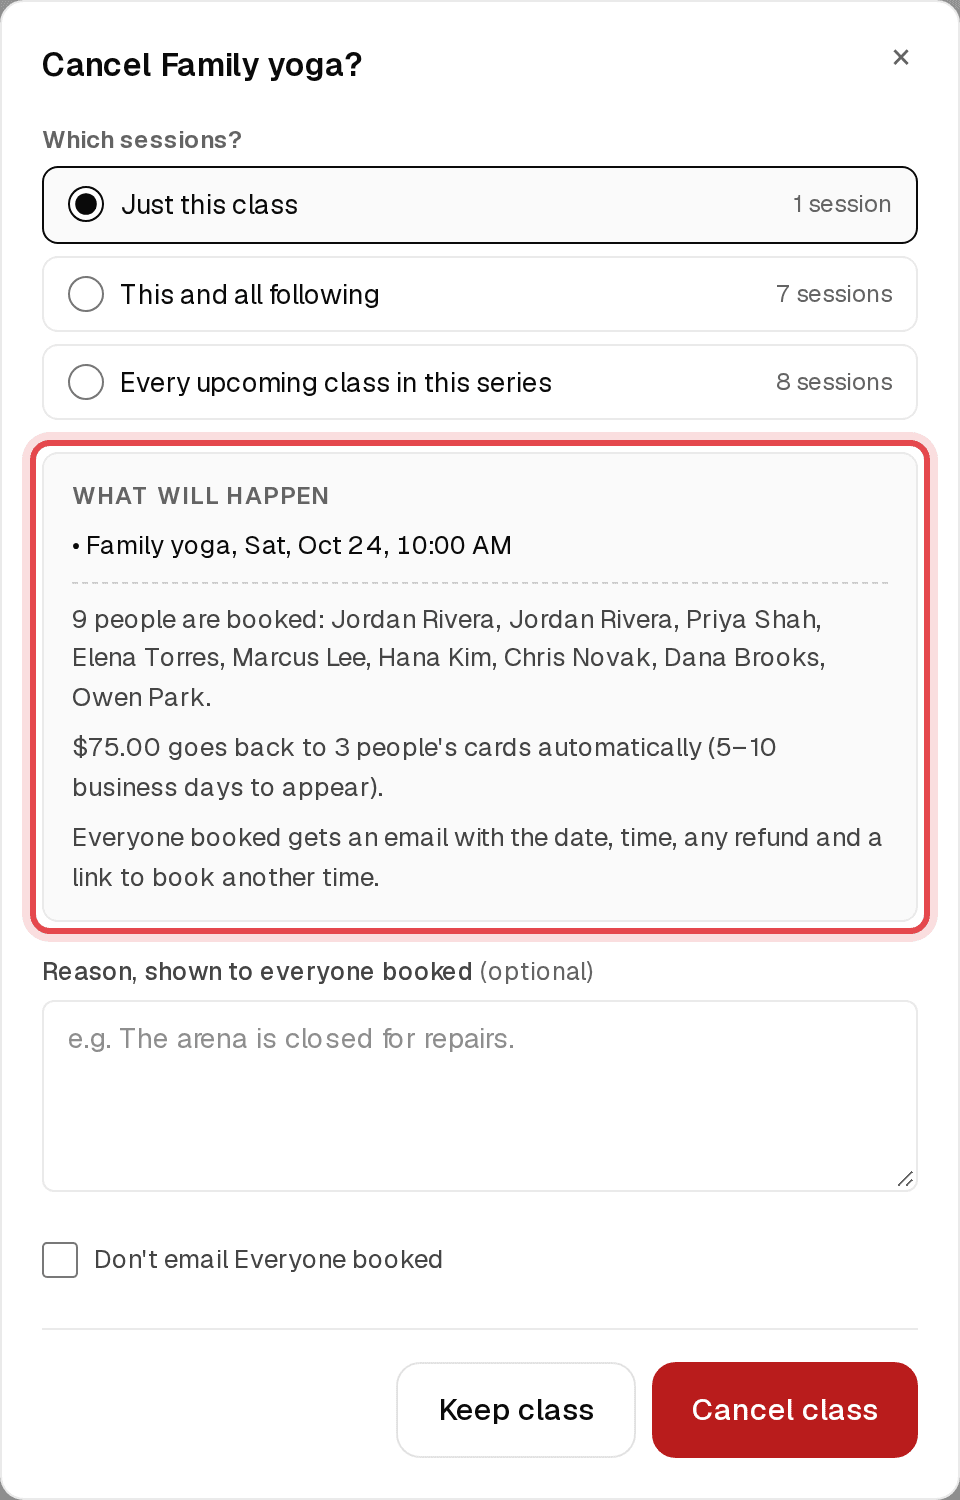
Tip: Card payments are refunded automatically and everyone booked gets an email. Raising the capacity offers the new spots to the waitlist.
Step 8: Pay at venue
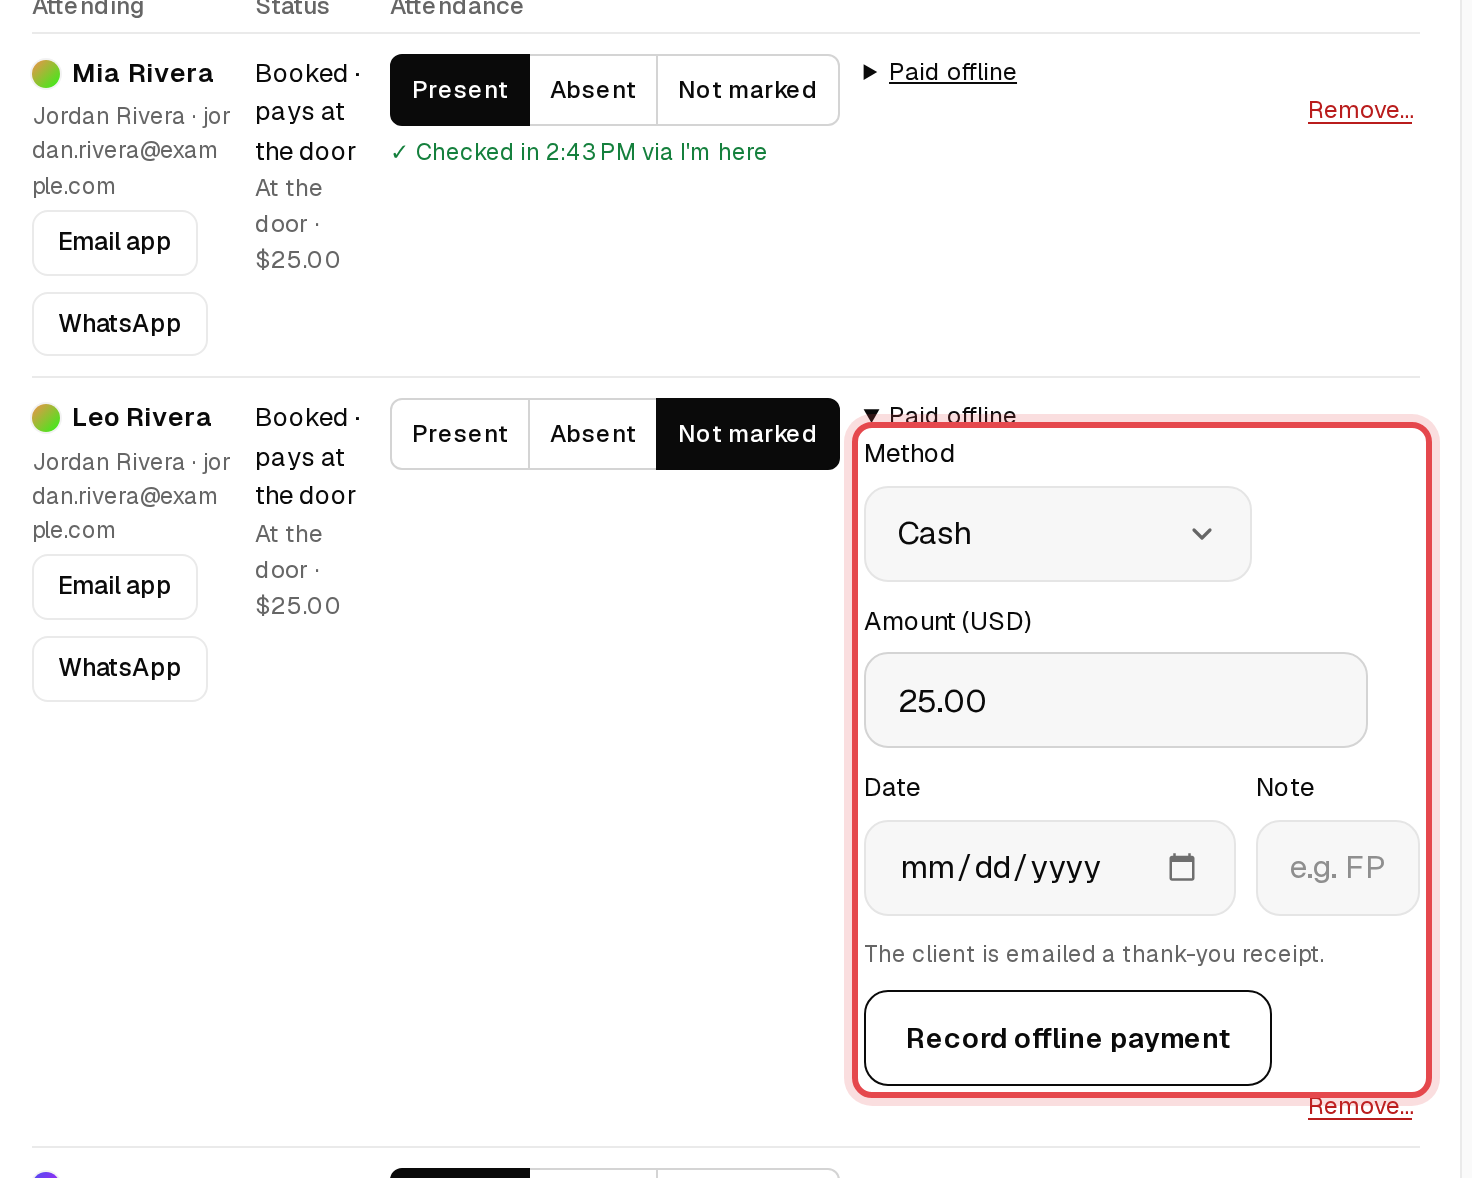
Pay-at-venue spots show At the venue on the roster. When someone pays you, click Paid offline on their row, pick the Method and amount, then click Record offline payment.
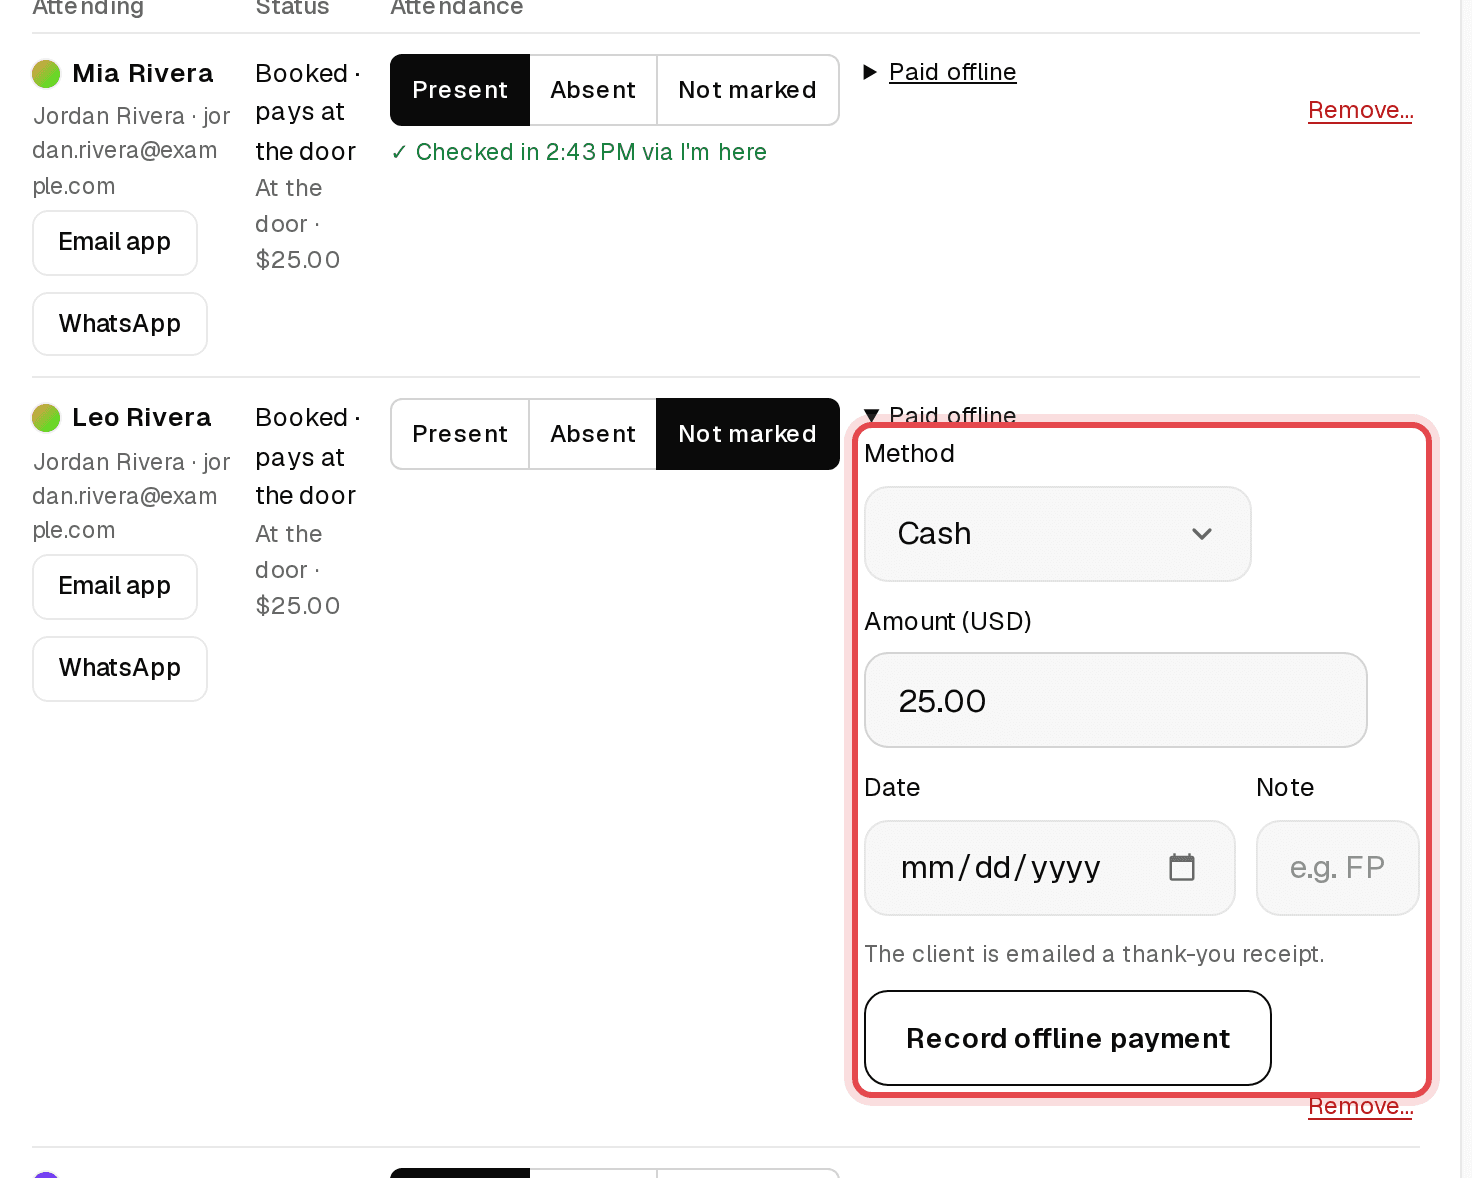
Tip: Your payment instructions (for example cash or Venmo) are shown on the client's spot page.